.png?height=120&name=wildcloud%20by%20WPCS%20logos%20(1).png)
While every tenant gets an URL on which it is available by default, it is customary to add a more good-looking domain. Learn how to manage the domains of your tenants here.
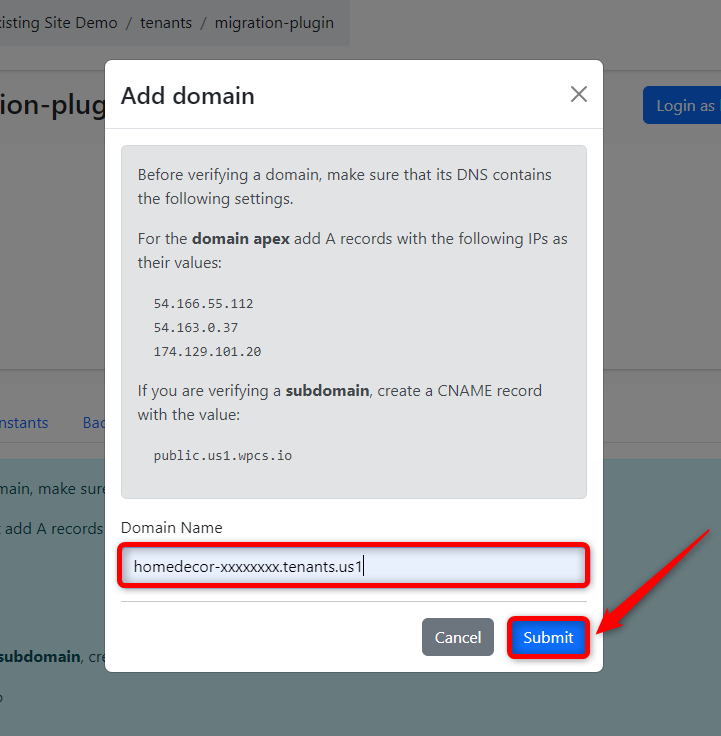
When you create a new tenant, it will be available under a domain name like “https://a-tenant-0qkj97c4.tenants.wpcs.io”. However, if you have bought a domain name from somewhere else, then you should add the domain name in wildcloud exactly the same, without using www or any other subdomains.
Note: It is important to add all A records because these records decrease the reliability of your tenant's website.
In this documentation, we will explore the steps for the following sections:
- Add a Domain
- Verify a Domain
- Delete a Domain
Let’s get started🚀
Add a Domain
Step 1: Log in to your wildcloud account and you will be navigated to the Applications page by default.

Step 2: Click on Go To App of the app in which you want to add a domain.

Note: You can also click on the application name as it will navigate you to the same window.

Step 3: Click on the Tenants option from the left side menu and it will navigate you to the tenant details page.

Step 4: Click on the Tenant name to add a new domain to the tenant.
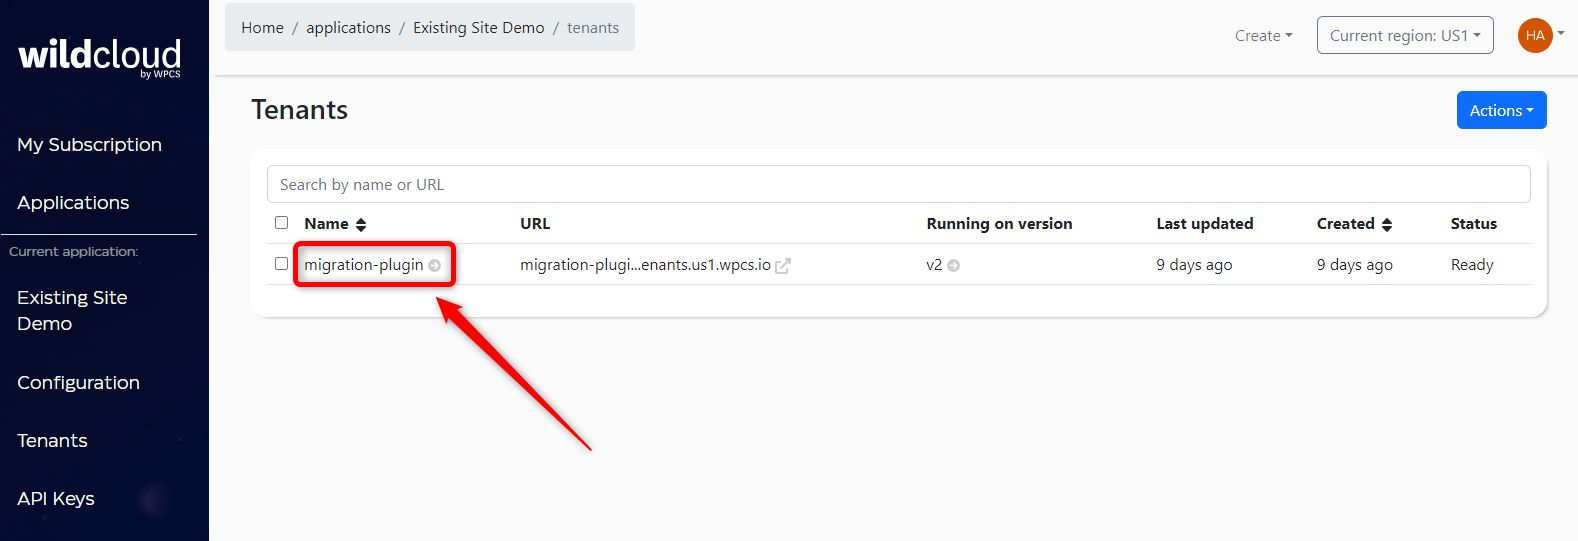
Alternatively, you can also move to the tenant section and click on the tenant name. It will navigate you to the same window.

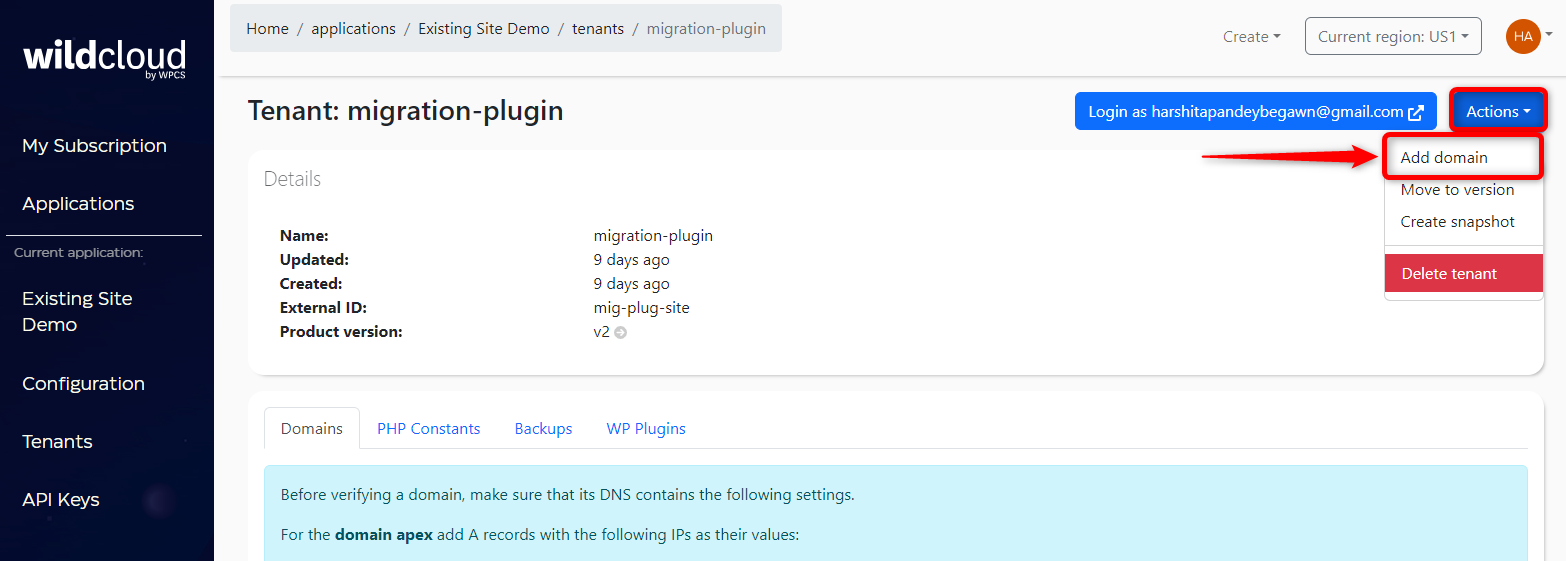
Step 5: Click on the Actions drop-down menu and select the Add domain option.
Step 6: Enter the Domain name and click on the Submit button.
Your newly created domain name will be added to the list.

Verify a Domain
Step 1: Log in to your wildcloud account and you will be navigated to the Applications page by default.
Step 2: Click on Go To App of the app in which you want to verify a domain.
Note: You can also click on the application name as it will navigate you to the same window.
Step 3: Click on the Tenants option from the left side menu and it will navigate you to the tenant details page.
Step 4: Click on the Tenant name to verify a new tenant domain.
Alternatively, you can also move to the tenant section and click on the tenant name. It will navigate you to the same window.
Step 5: Click on the Domains sub-section, which is selected by default.
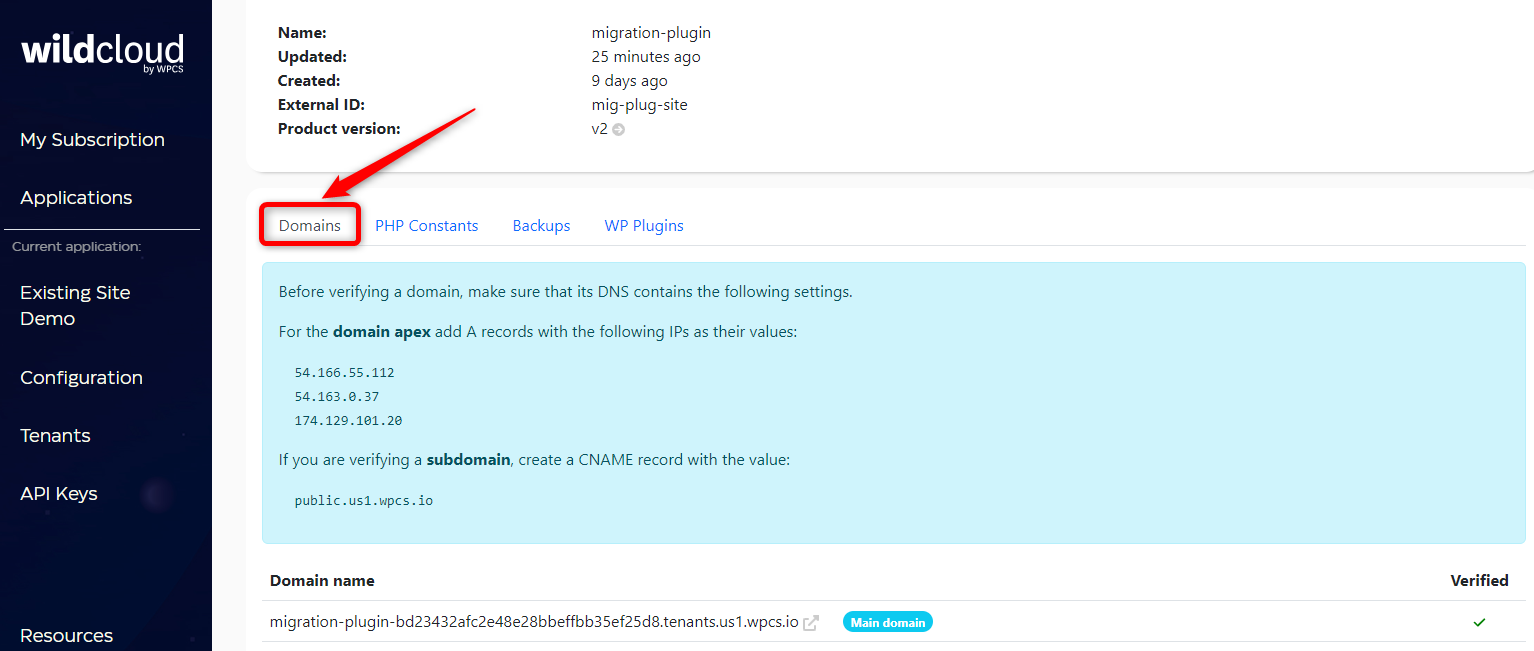
Step 6: Hover your cursor on the domain name that you want to verify and click on the Verify button. This will verify if a website or tenant is available under a certain domain.

Delete a Domain
Step 1: Log in to your wildcloud account and you will be navigated to the Applications page by default.
Step 2: Click on Go To App of the app in which you want to delete a domain.
Note: You can also click on the application name as it will navigate you to the same window.
Step 3: Click on the Tenants option from the left side menu and it will navigate you to the tenant details page.
Step 4: Click on the Tenant name to delete a domain.
Alternatively, you can also move to the tenant section and click on the tenant name. It will navigate you to the same window.
Step 5: Click on the Domains sub-section, which is selected by default.
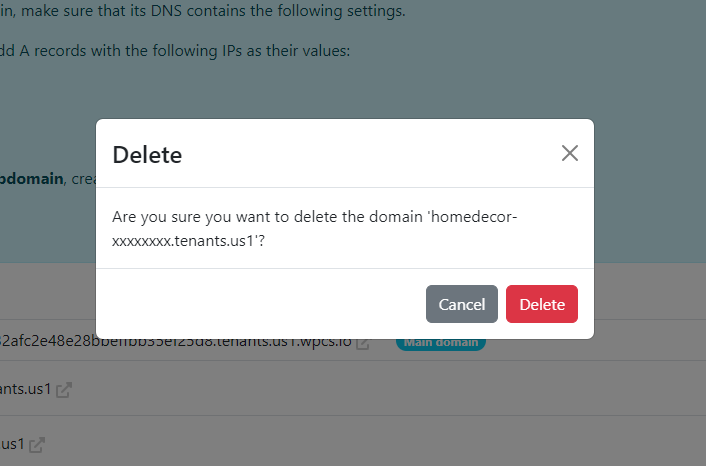
Step 6: Hover your cursor on the domain name that you want to delete and click on the delete icon.

Step 7: A modal window will appear to confirm the delete action. Click on the Delete button to permanently delete the domain.