.png?height=120&name=wildcloud%20by%20WPCS%20logos%20(1).png)
Backups are an essential part of any piece of software. No matter how well we design our processes, mistakes are going to be made. Check this guide on how to manage your backups within the wildcloud platform.
Tenant backups are automatically created depending on the application configuration and are stored for 30 days by default. After 30 days, the backups will get deleted automatically. However, you can also create, restore, and delete backups manually, whenever required.
In this documentation, we will explore steps to:
- Create a Backup
- Restore a Backup
- Delete a Backup
Let’s get started🚀
Create a Backup
To create a backup manually, perform the following steps:
Step 1: Log in to your wildcloud account and you will be navigated to the Applications page by default.
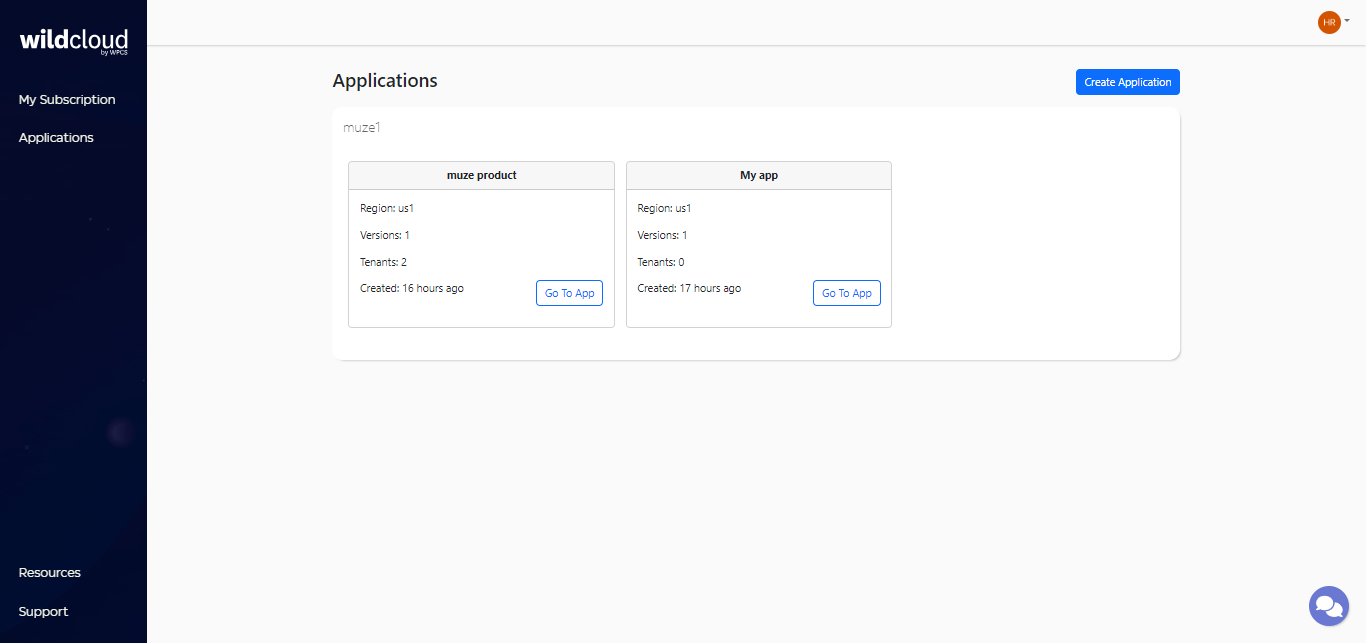
Step 2: Click on Go To App to navigate to the product page.

Note: You can also click on the application name as it will navigate you to the same window.

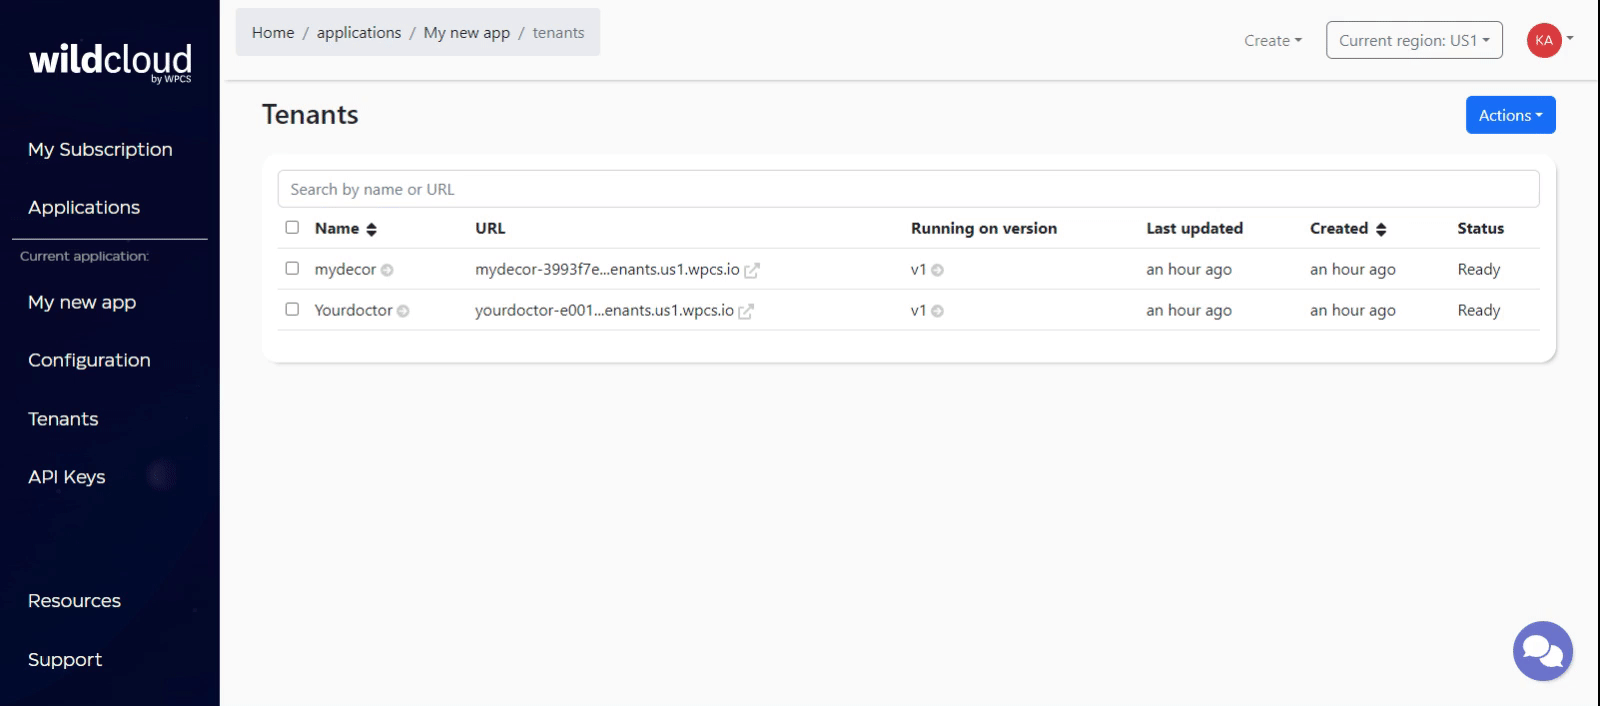
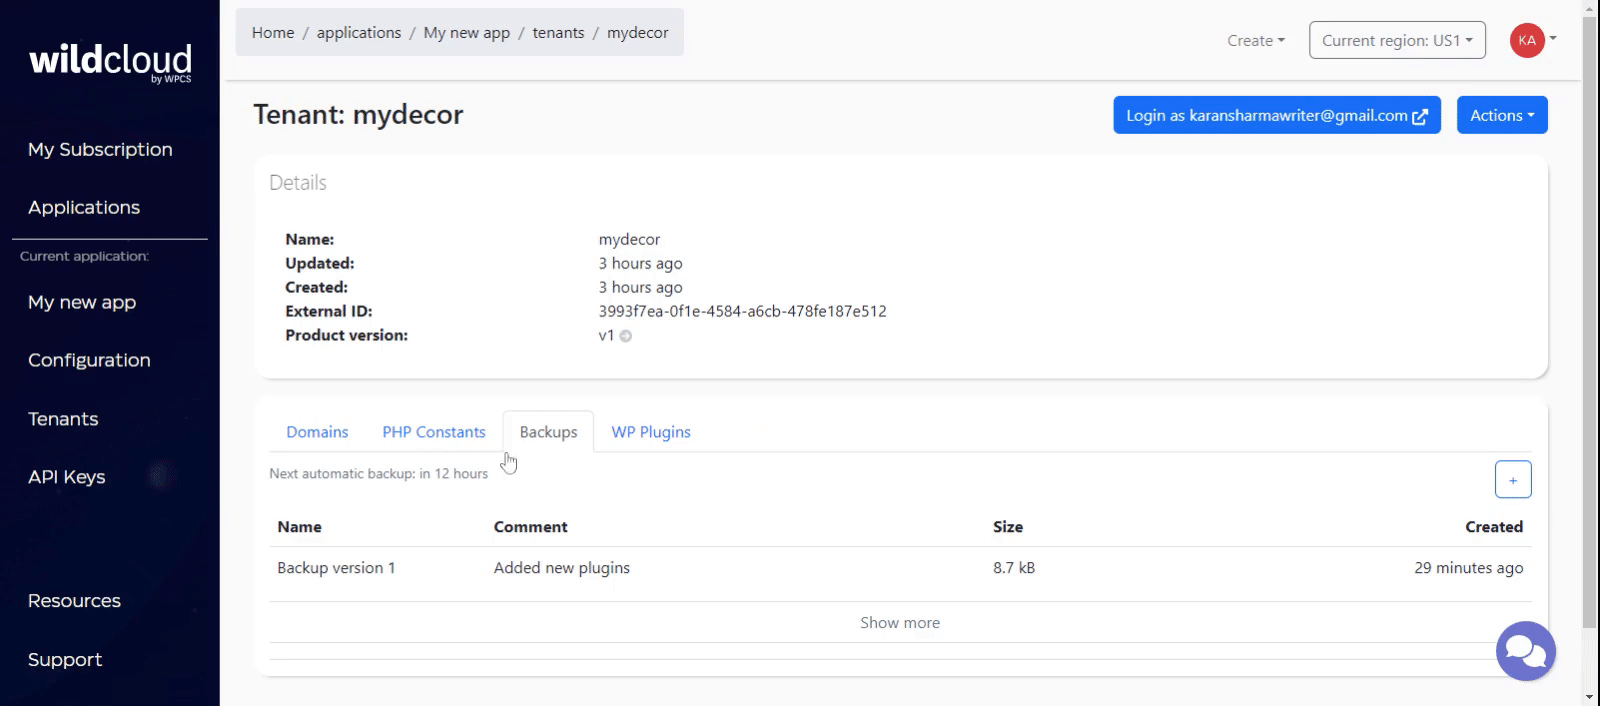
Step 3: Click on the Tenants button from the left menu bar of the interface.

Alternatively, you can also click on the Tenants at the bottom of the product page.
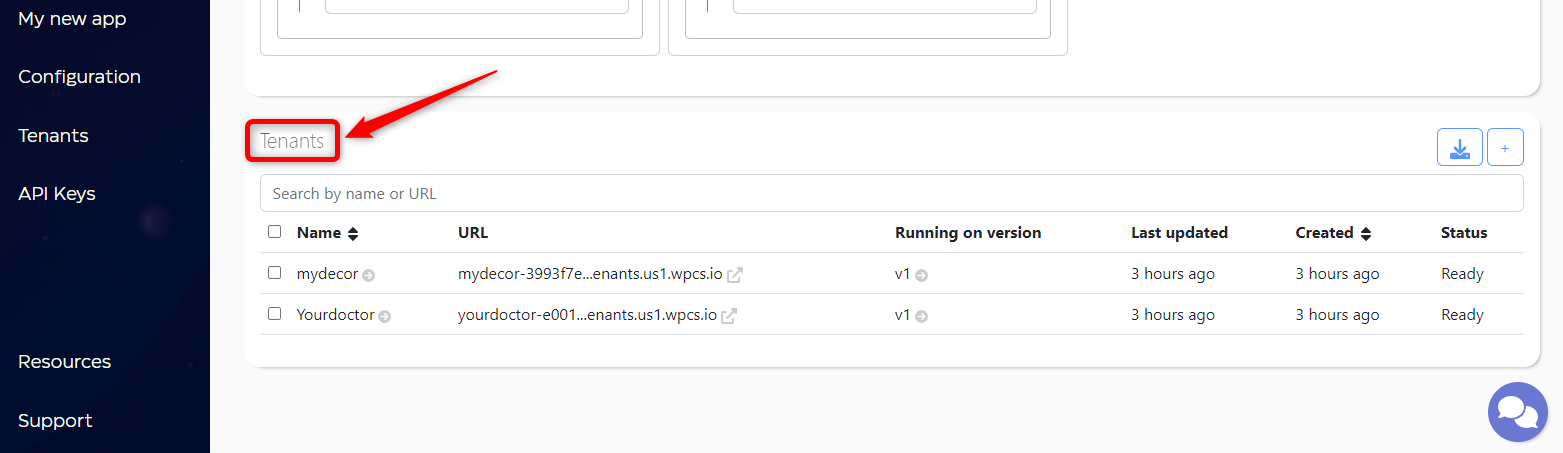
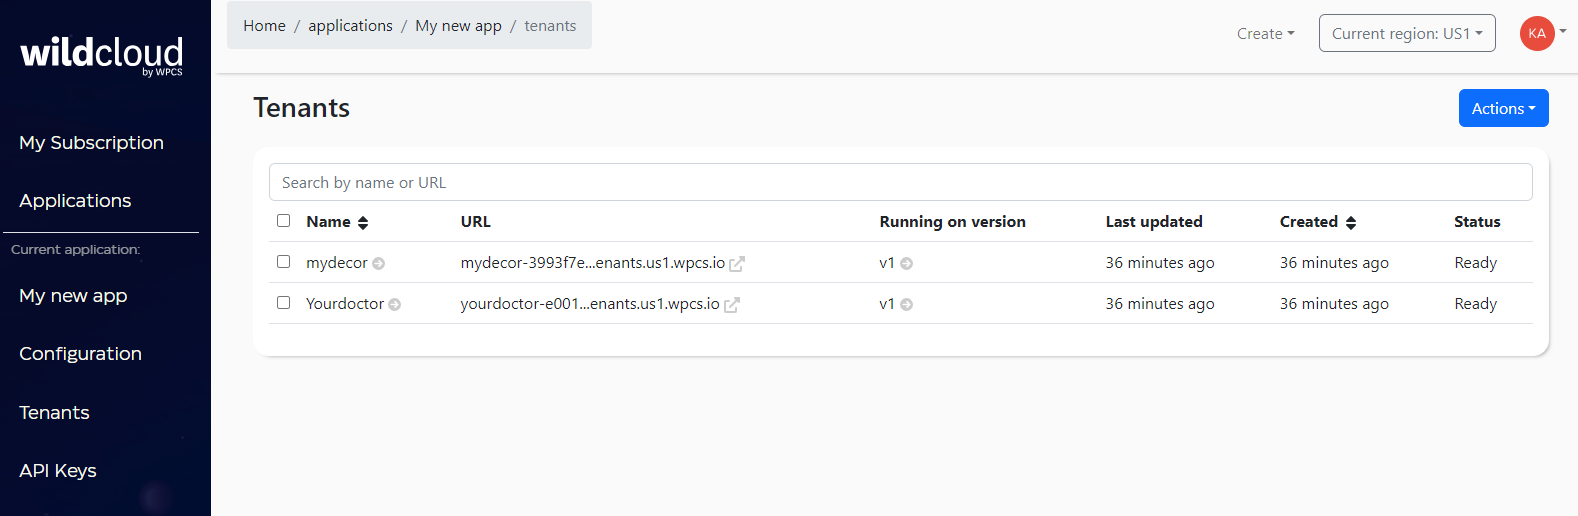
This will navigate you to the Tenants detail page where you can explore the list of tenants generated.
Step 4: Click on the tenant name for which you want to create a backup.
Step 5: Click on Backups and then click on the + button to create a manual backup.
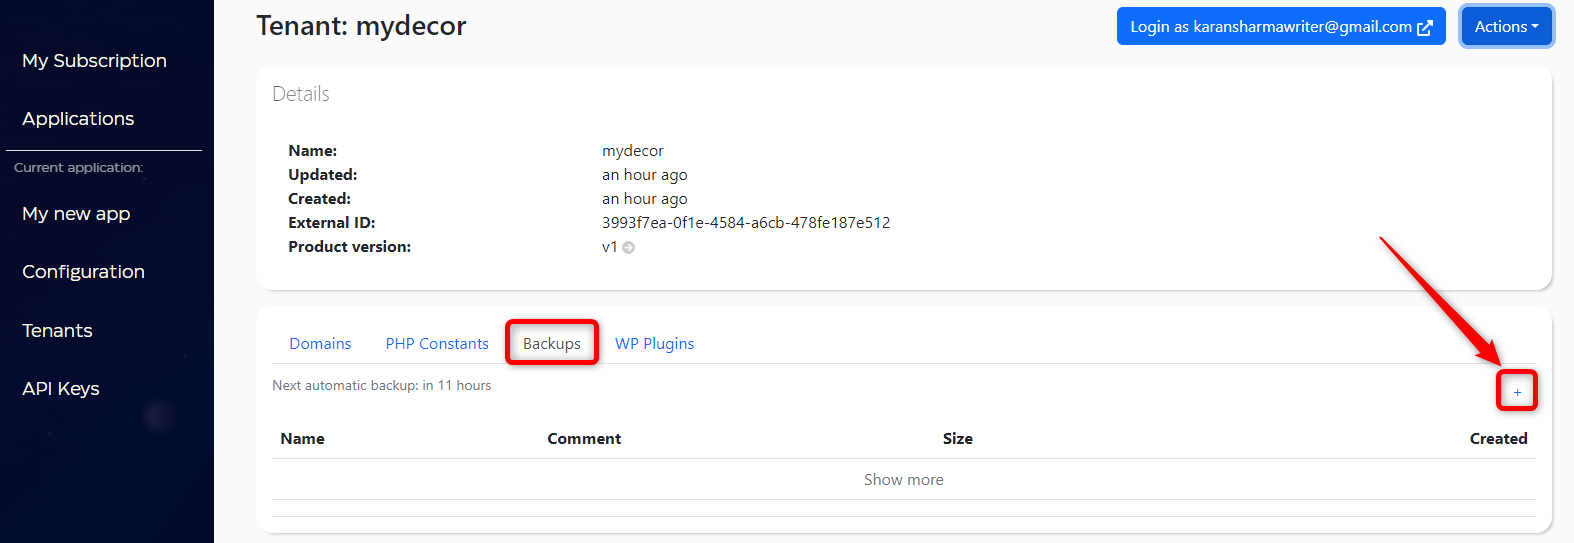
Step 6: Enter the requested information in the modal window and click on the Submit button.
- Name- Enter the name for the tenant backup
- Comment- Add comments

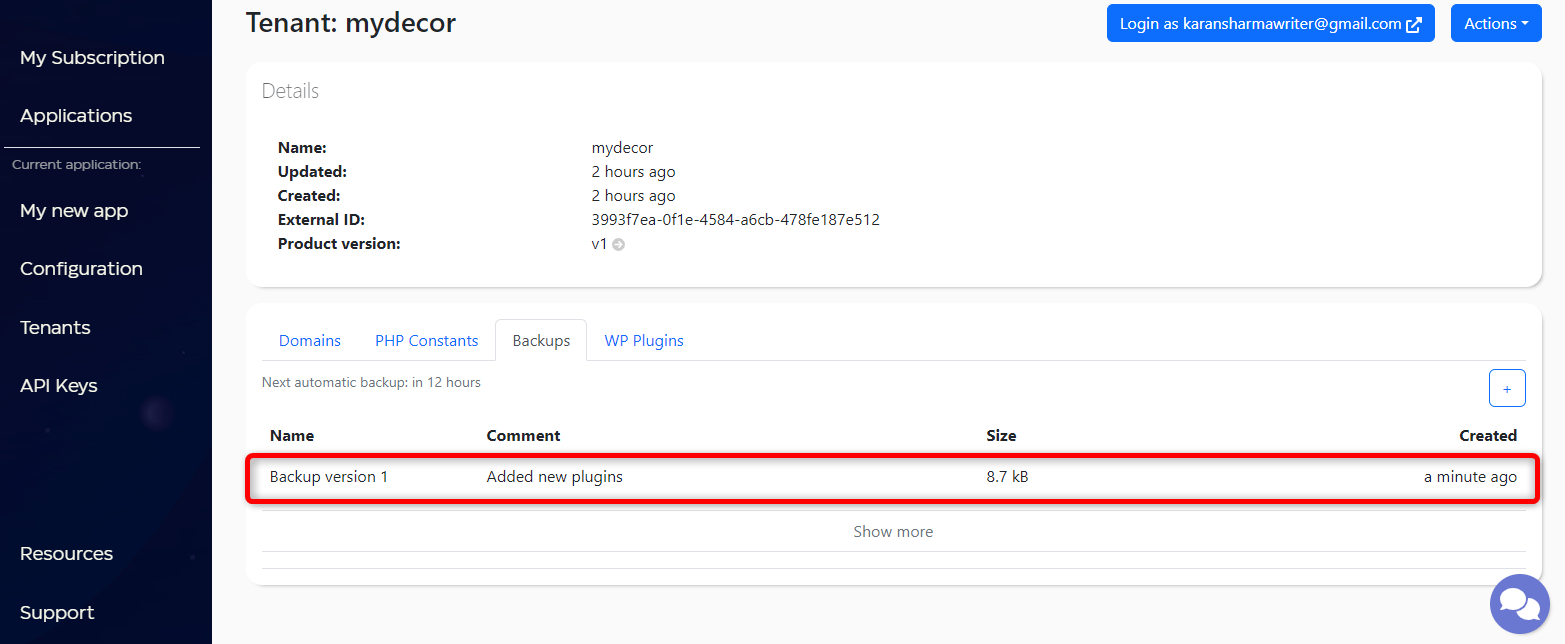
The newly created backup will be added to the list.
Note: After creating a backup manually, the next backup will be made after 12 hours.
Restore a Backup
Backups can be restored in the tenant detail screen. To restore a backup, perform the following steps:
Step 1: Log in to your wildcloud account and you will be navigated to the Applications page by default.
Step 2: Click on Go To App to navigate to the product page.
Note: You can also click on the application name as it will navigate you to the same window.
Step 3: Click on the Tenants from the left menu of the interface.
Alternatively, you can also click on the Tenants at the bottom of the product page.
This will navigate you to the Tenants detail page where you can explore the list of tenants generated.
Step 4: Click on the tenant name for which you want to restore the backup.
Step 5: Click on Backups to proceed further.
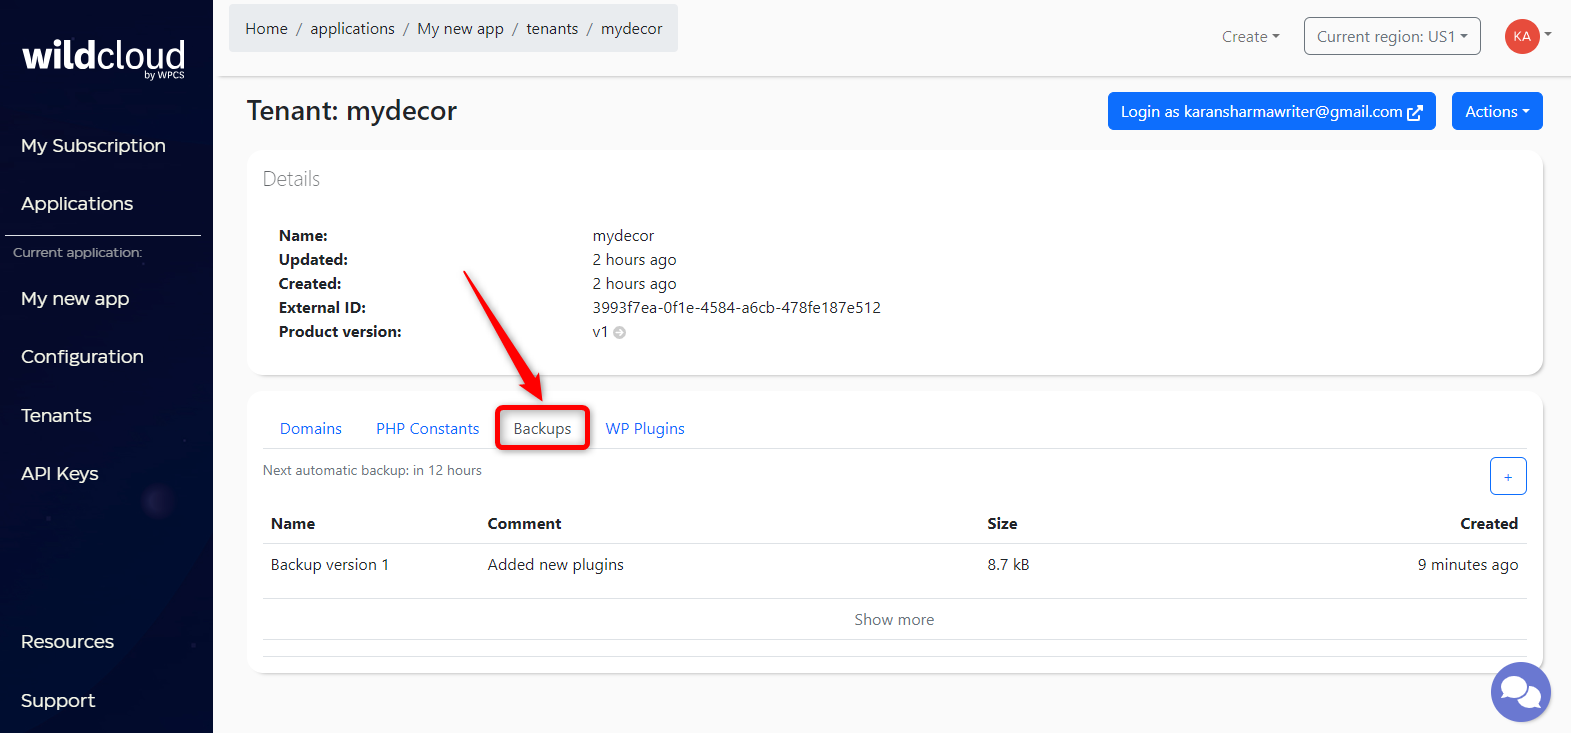
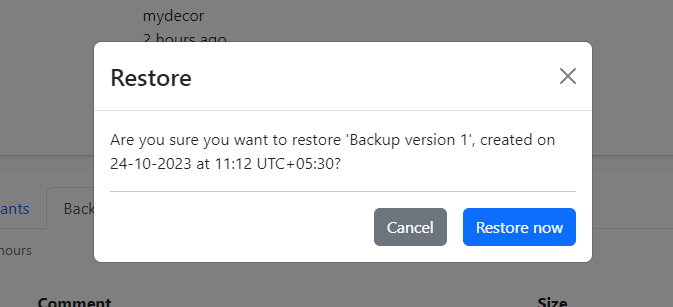
Step 6: Hover the cursor over the backup and click on the Restore button.

A modal window will appear for the confirmation of the action. Click on the Restore now button to restore the tenant backup.
Note: Any changes made after the last backup, will be permanently deleted when restoring a backup.
Delete a Backup
Backups are automatically deleted after 30 days. However, to delete a backup manually, perform the following steps:
Step 1: Log in to your wildcloud account and you will be navigated to the Applications page by default.
Step 2: Click on Go To App to navigate to the product page.
Note: You can also click on the application name as it will navigate you to the same window.
Step 3: Click on the Tenants from the left menu of the interface.
Alternatively, you can also click on the Tenants at the bottom of the product page.
This will navigate you to the Tenants detail page where you can explore the list of tenants generated.
Step 4: Click on the tenant name for which you want to delete the backup.
Step 5: Click on Backups to proceed further.
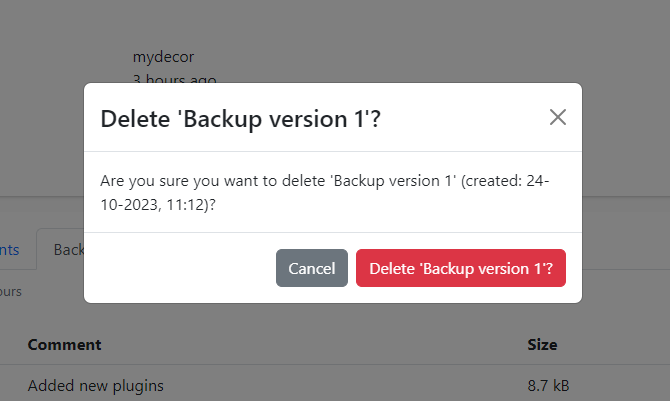
Step 6: Hover the cursor over the backup and click on the Delete icon.
A modal window will appear for the confirmation of the action. Click on the Delete button to permanently delete the tenant backup.
Note: When a backup is deleted, it can not be restored.