.png?height=120&name=wildcloud%20by%20WPCS%20logos%20(1).png)
Our storefront plugins help you automate website creation. Follow this guide on how to create a storefront.
The storefront is defined as an application that uses the API feature provided by wildcloud to provision and manage tenants on the wildcloud platform. You can connect more than one Storefront to an Application, which allows you to have multiple specialized stores or set up a local development environment.
In this documentation, we will explore the steps to create a storefront.
Let’s get started🚀
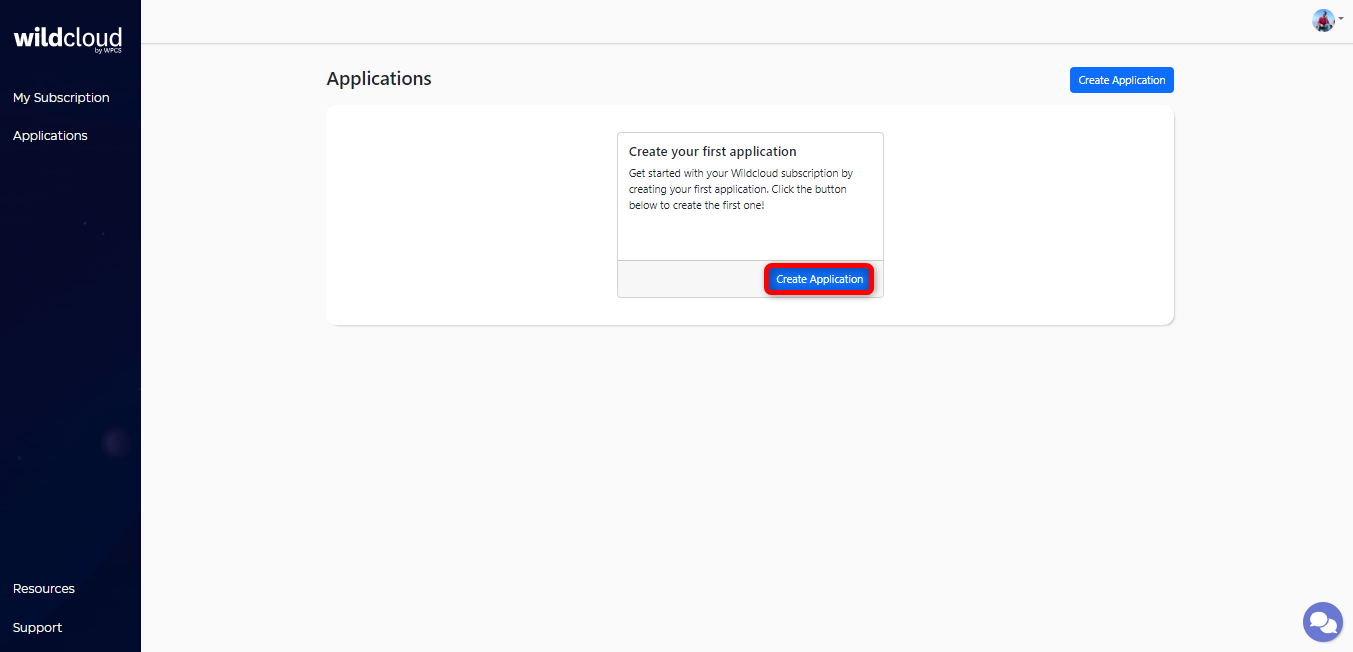
Step 1: Log in to your wildcloud account and you will be navigated to the Applications page by default.

Step 2: Click on the Create Application to build your first application.
This will navigate you to the Create new application page providing you with a few options to start creating your application.
Step 3: Click on Create a Storefront and click Next at the bottom of the page to start working on your application.


Step 4: Enter the name that you want to give to your storefront application and click on the Next button.

Step 5: Select the Region in which you want to create your storefront and click on the Next button.

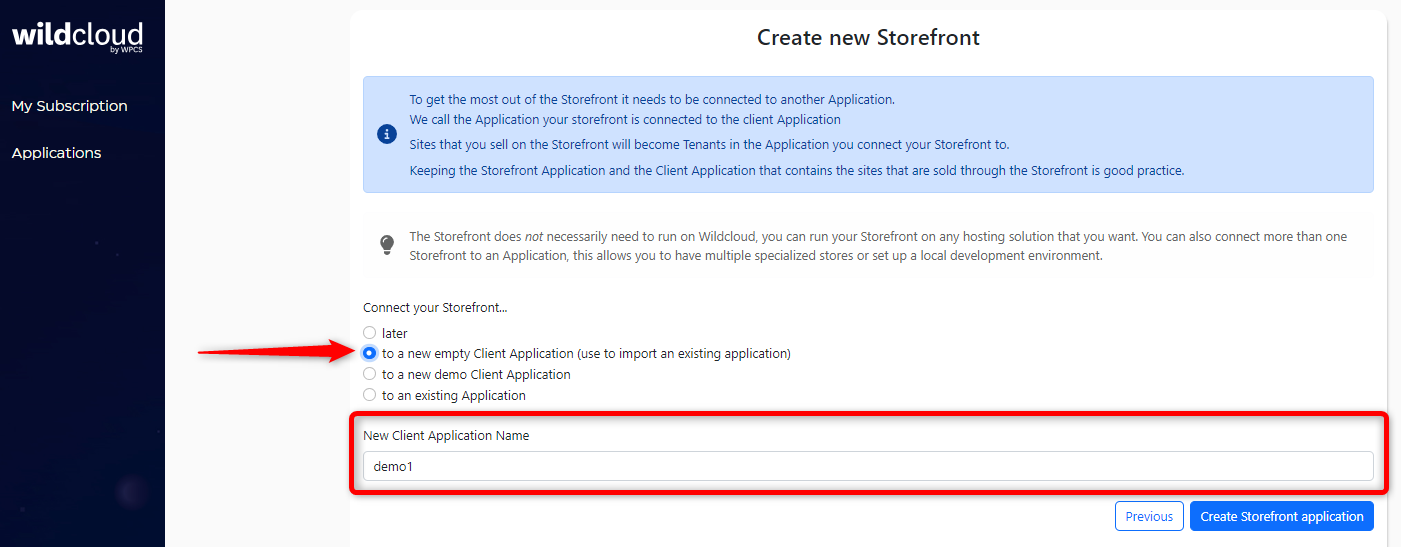
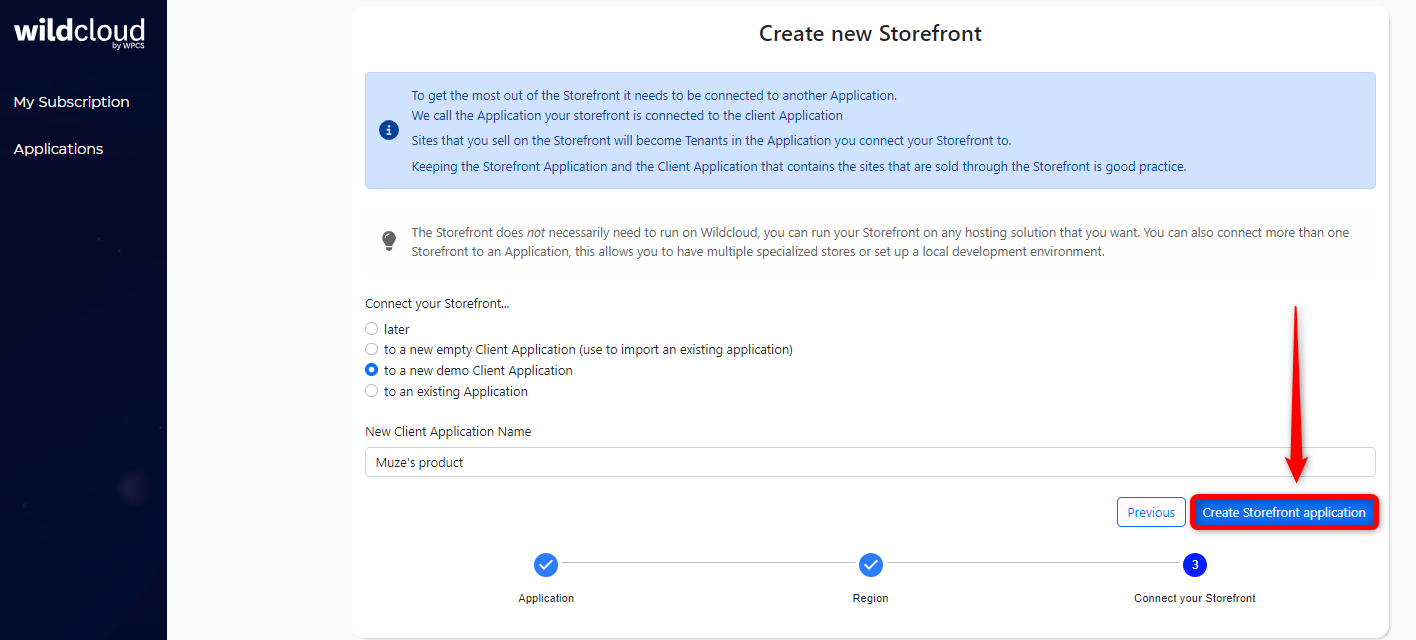
Step 6: Connect your storefront to an application by selecting any of the available options.
Note: When you launch a storefront, you will have a separate application in which the storefront will exist.
Option 1: Select “later” to connect your storefront to an application later on. Choose this option when you do not want to create the application and want to focus on creating the storefront only. In this case, only the storefront gets created.

Option 2: Select “to a new empty Client Application” and enter the New Client Application Name. Select this option when you want to import an existing site or want to build it from scratch. In this case, a storefront and empty client application will be created.
Option 3: Select “to a new demo Client Application” and enter the New Client Application Name. In this case, the storefront application and a demo client application is created. The demo application will have API keys and the storefront tenant will have those API Keys as PHP Constants. Moreover, the demo application consists of different tenant snapshots that can be used to create new tenants with the storefront.

Option 4: Select “to an existing application” and choose an application from the dropdown menu. Select this option if you have already created your client application and now want to create a storefront application.
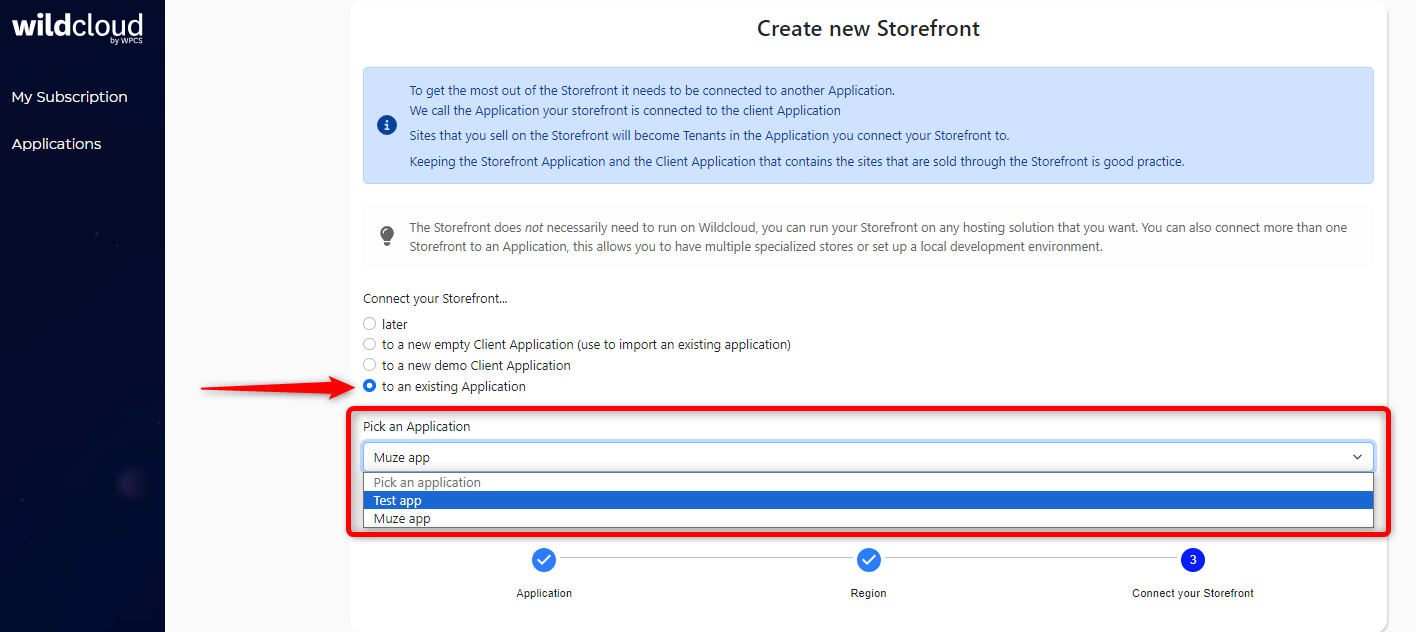
After making a selection, click on the Create Storefront application button.
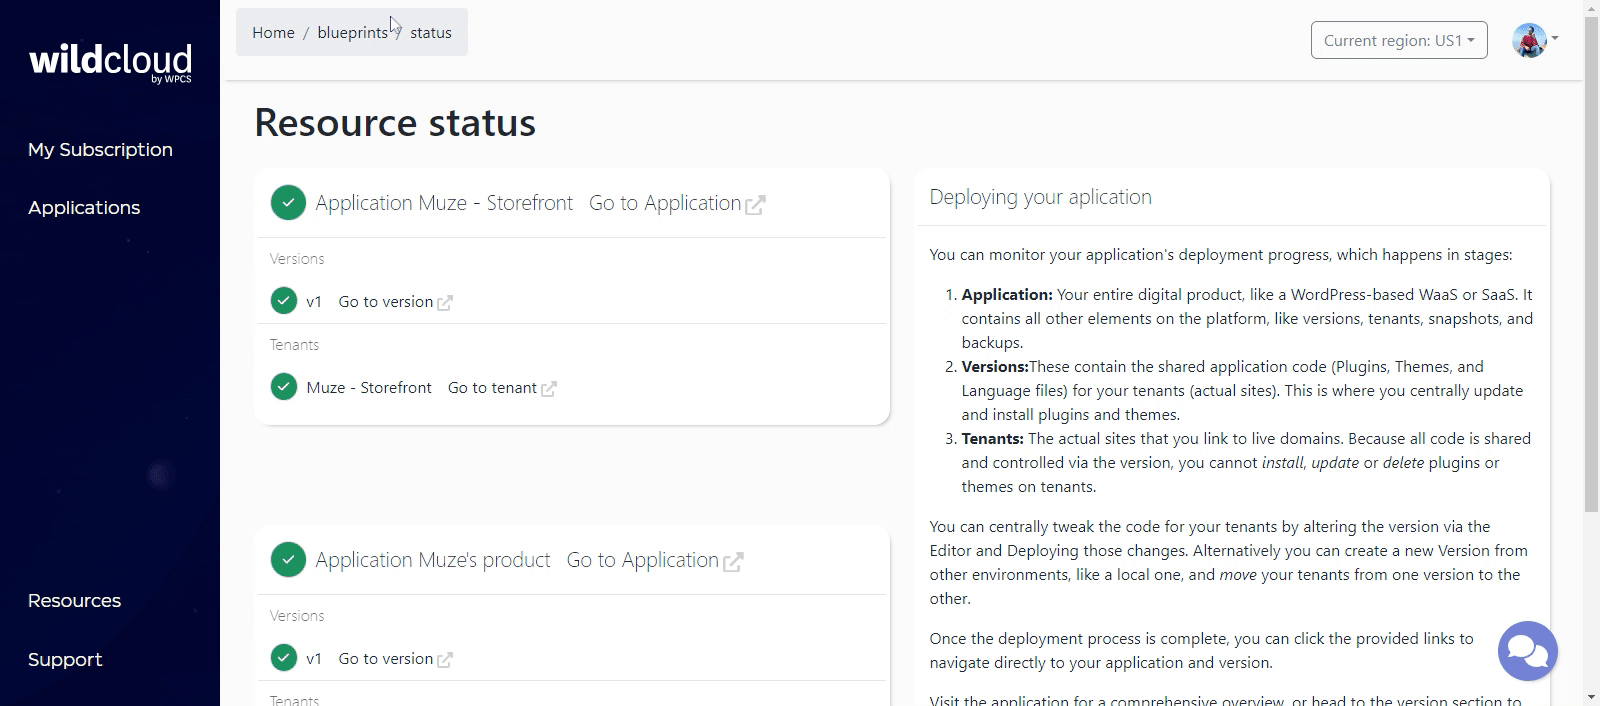
This will create your storefront application and navigate you to the Resource status page where you can view your newly created “storefront” and “connected application” along with the current version and tenant.
Note: It may take a few minutes to show the storefront application resource status.
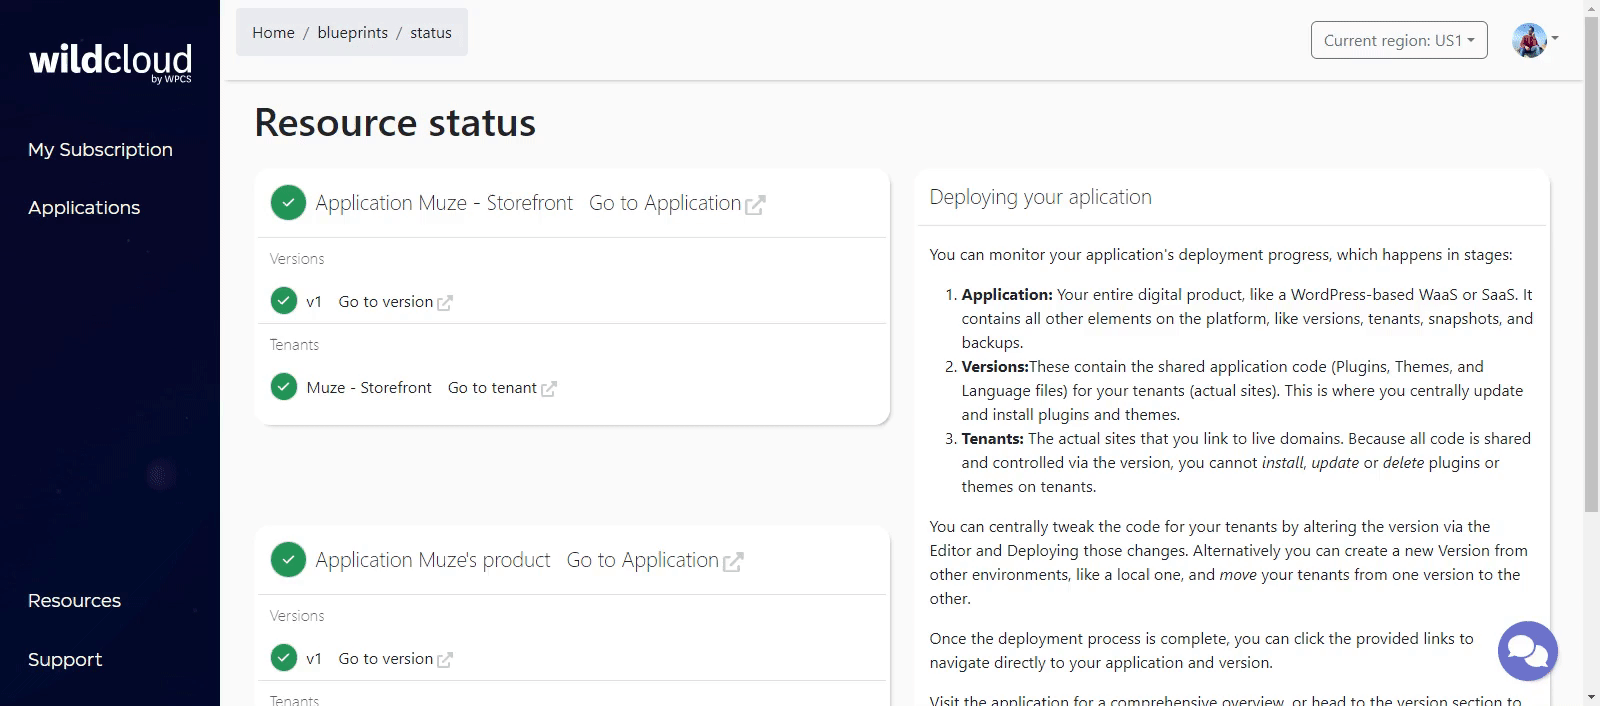
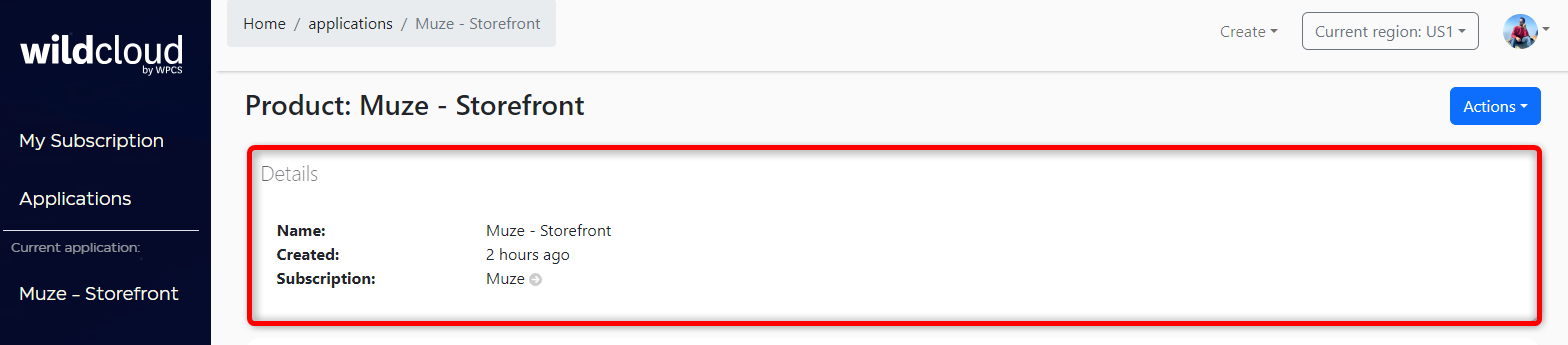
Step 7: Click on Go to Application to view your newly created storefront details.

This will navigate you to the Storefront details page where you can explore general information about the storefront, version details, and tenant details.
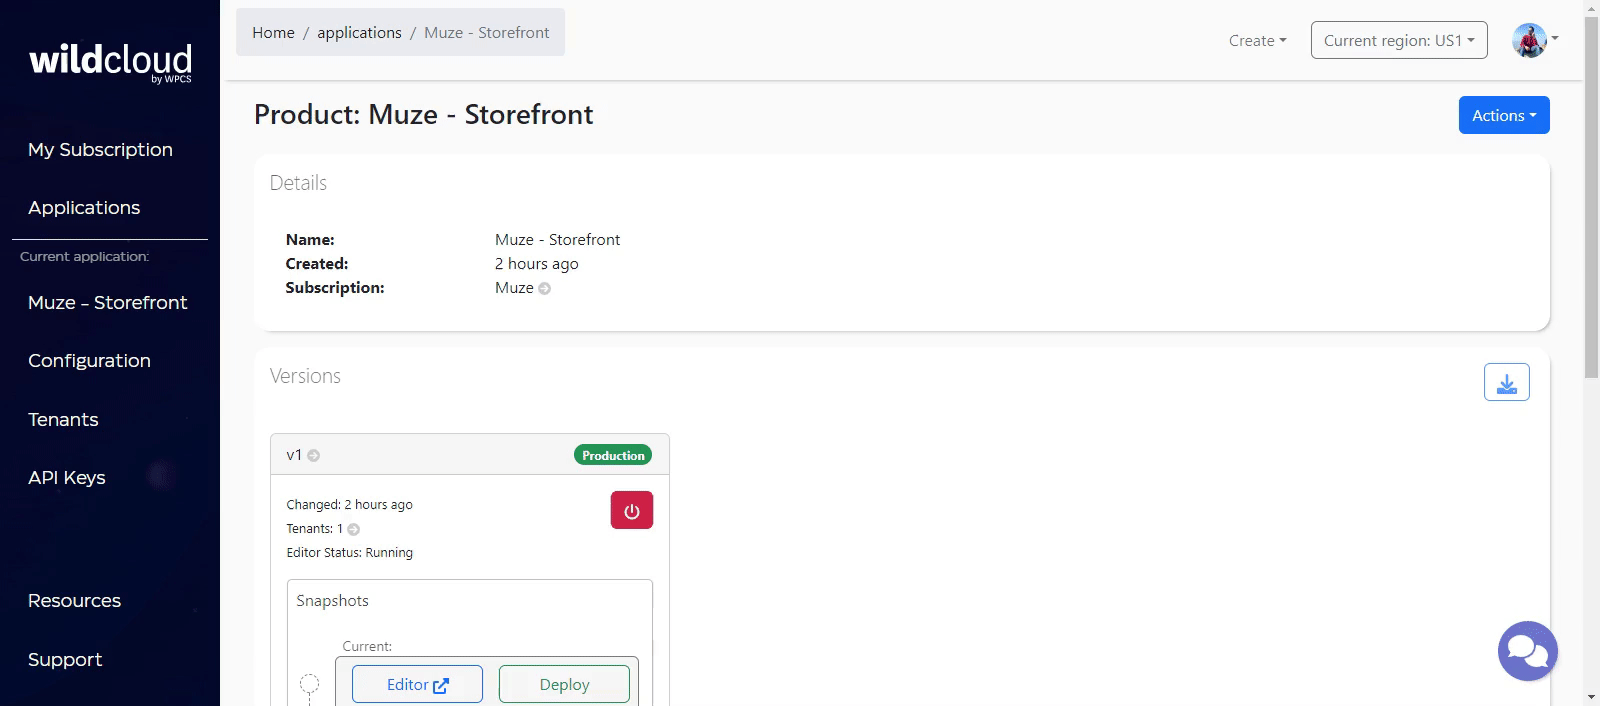
Storefront Details
General Information
|
Attribute |
Description |
|
Name |
Name of the Storefront |
|
Created |
Timestamp when the storefront was created |
|
Subscription |
Subscription under which the storefront is created |
Versions
Navigate to this section to perform the following actions:

You can also view all the snapshots (version, tenant, custom) created under the respective version of the newly created storefront.
Tenants
Navigate to this section to perform the following actions:

You can also view the tenants created and explore the following information.
|
Attribute |
Description |
|
Name |
Name of the created tenant |
|
URL |
URL link of the tenant |
|
Running on version |
Displays the version on which the tenant was created |
|
Last updated |
Timestamp when the tenant was updated last time |
|
Created |
Timestamp when the tenant was created |
|
Status |
Displays the status of the tenant |

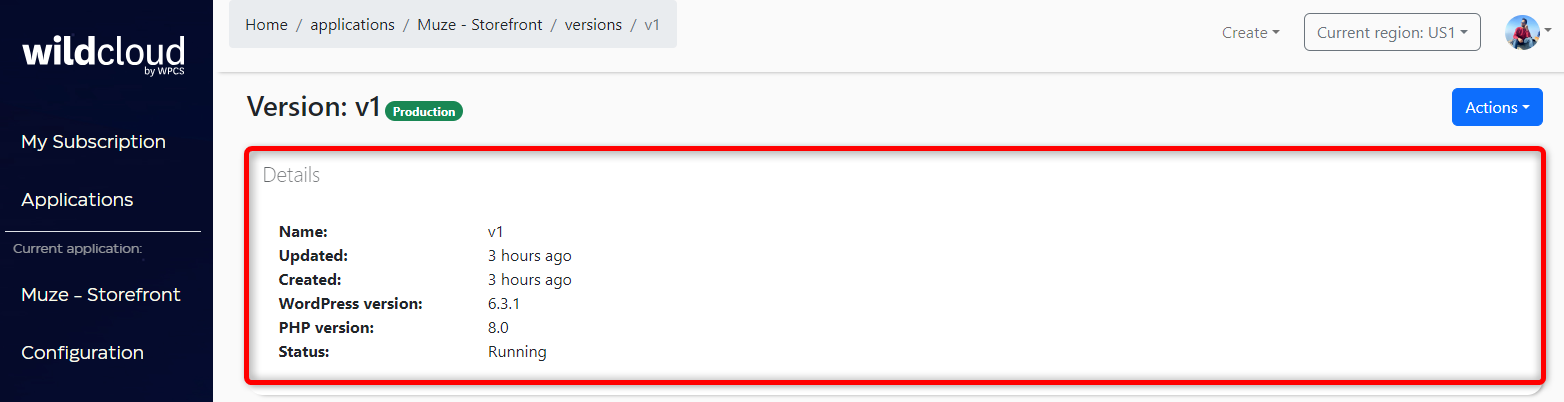
Step 8: Click on Go to version to view the first version of your newly created storefront.
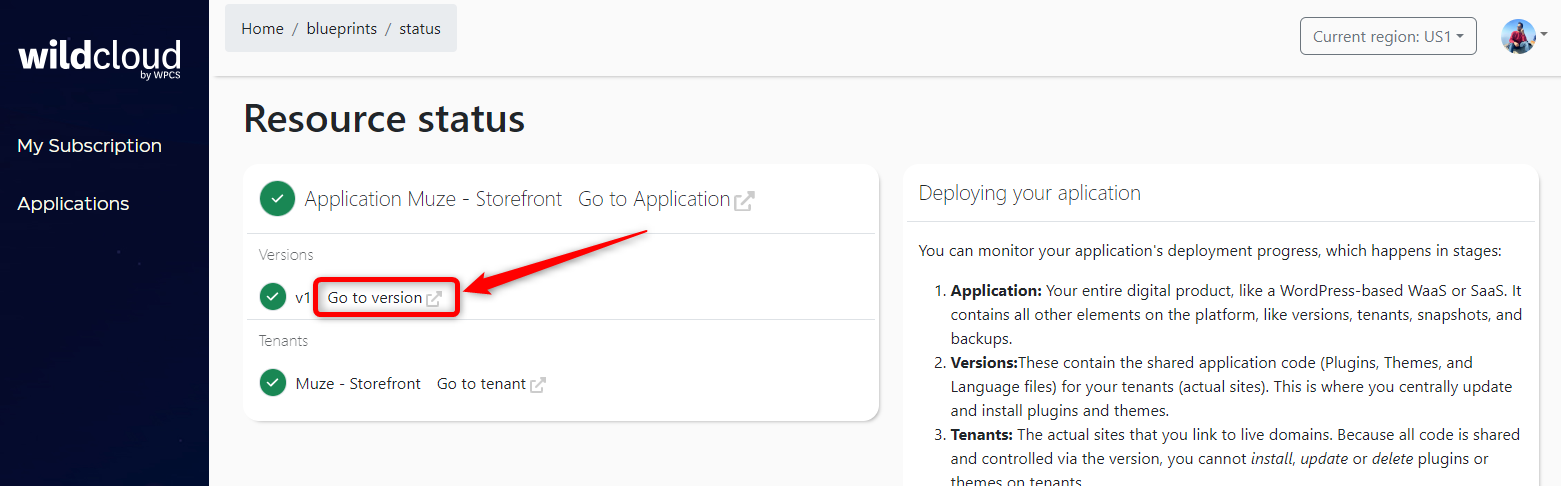
This will navigate you to the version details page of the newly created storefront where you can explore general information about the version, tenants, and snapshots.
Version Details
General Information
|
Attribute |
Description |
|
Name |
Displays the name of the version |
|
Updated |
Timestamp when the version was updated last time |
|
Created |
Timestamp when the version was created |
|
WordPress version |
Displays the WordPress version of the version |
|
PHP version |
Displays the PHP version of the version |
|
Status |
Displays the status of the version |
Tenants
You can view the list of the created tenants and view the following information related to them.
|
Attribute |
Description |
|
Name |
Name of the created tenant |
|
URL |
URL link of the tenant |
|
Last updated |
Timestamp when the tenant was updated last time |
|
Created |
Timestamp when the tenant was created |
|
Status |
Displays the status of the tenant |

Snapshots
Displays all the snapshots (version, tenant, custom) created under the respective version of the newly created storefront.

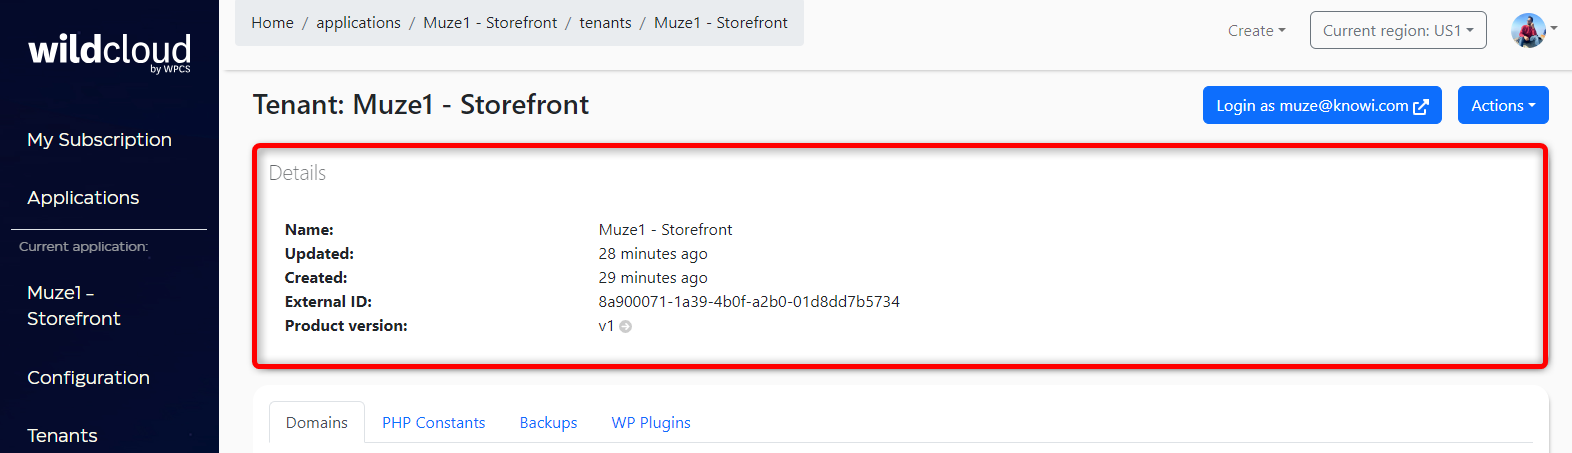
Step 9: Click on Go to tenant to view tenants of your newly created storefront.

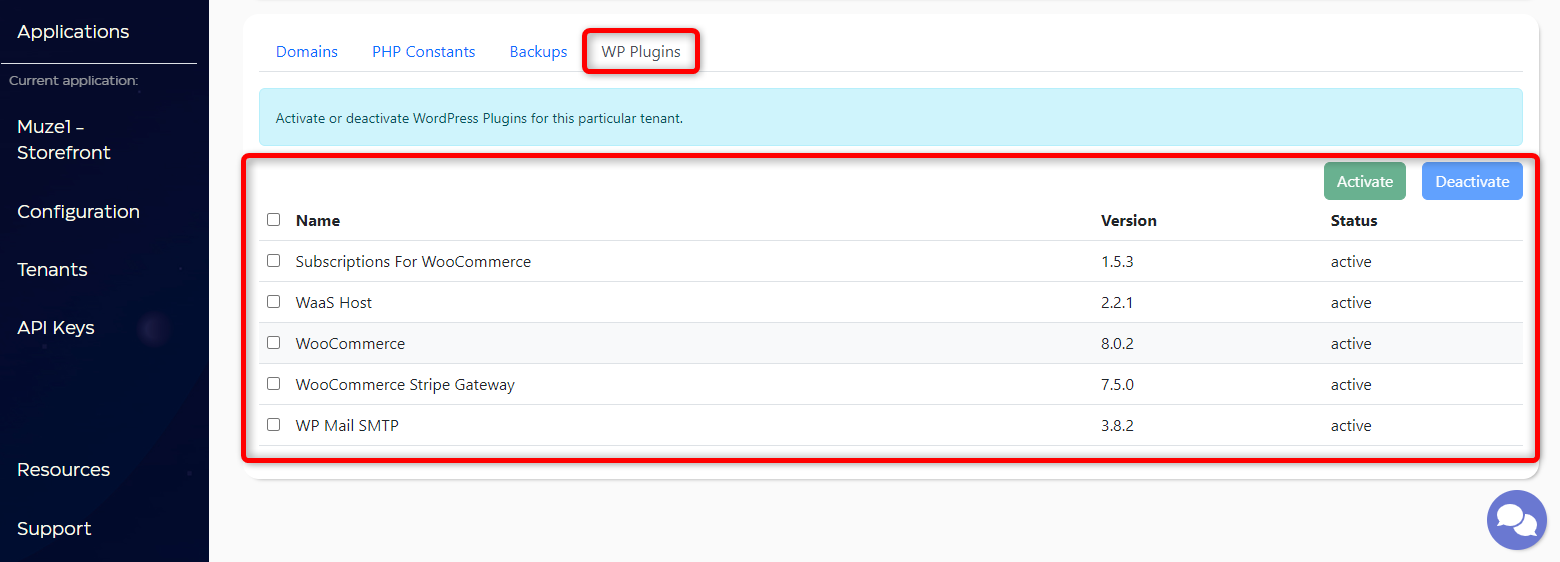
This will navigate you to the tenant details page of the newly created storefront where you can explore general information about the tenants, domains, PHP constants, backups, and WP plugins.

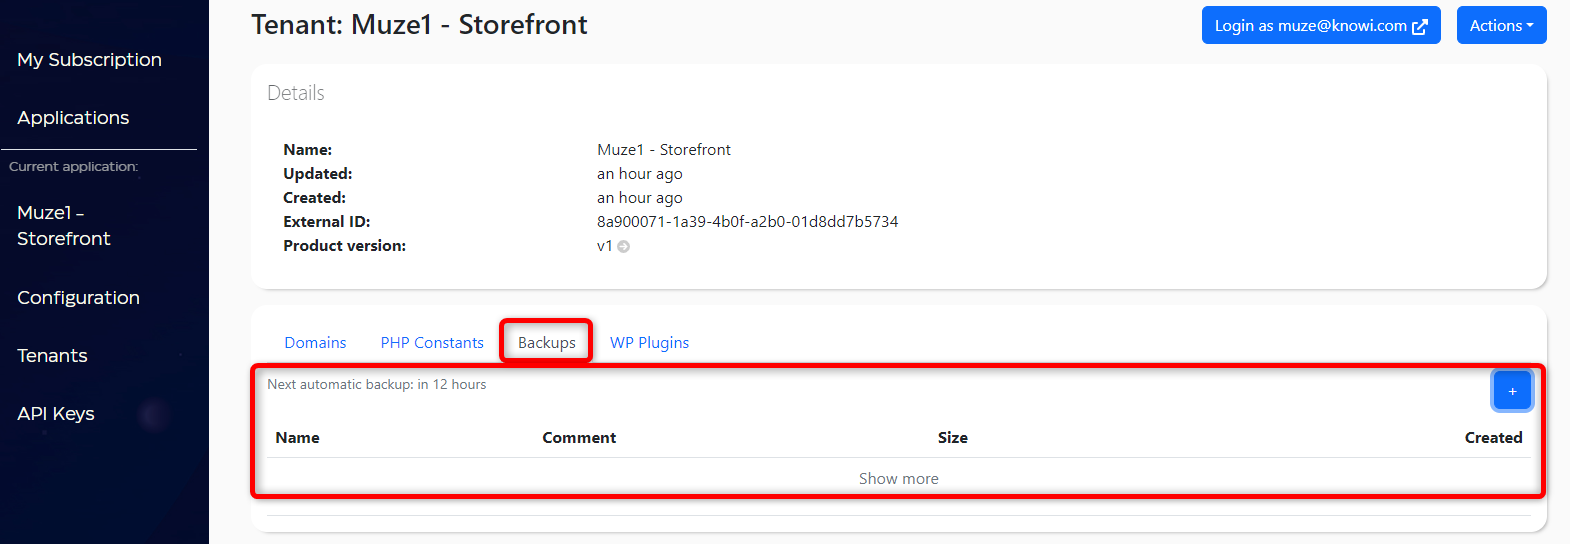
Tenant Details
General Information
|
Attribute |
Description |
|
Name |
Displays the name of the tenant |
|
Updated |
Timestamp when the tenant was updated last time |
|
Created |
Timestamp when the tenant was created |
|
External ID |
Displays the external ID (identifier) of the tenant |
|
Product version |
Displays the version of the tenant |
Domains
Displays the domain name of the newly created storefront.
For more information, refer to the Add, Verify & Delete Domain documentation.

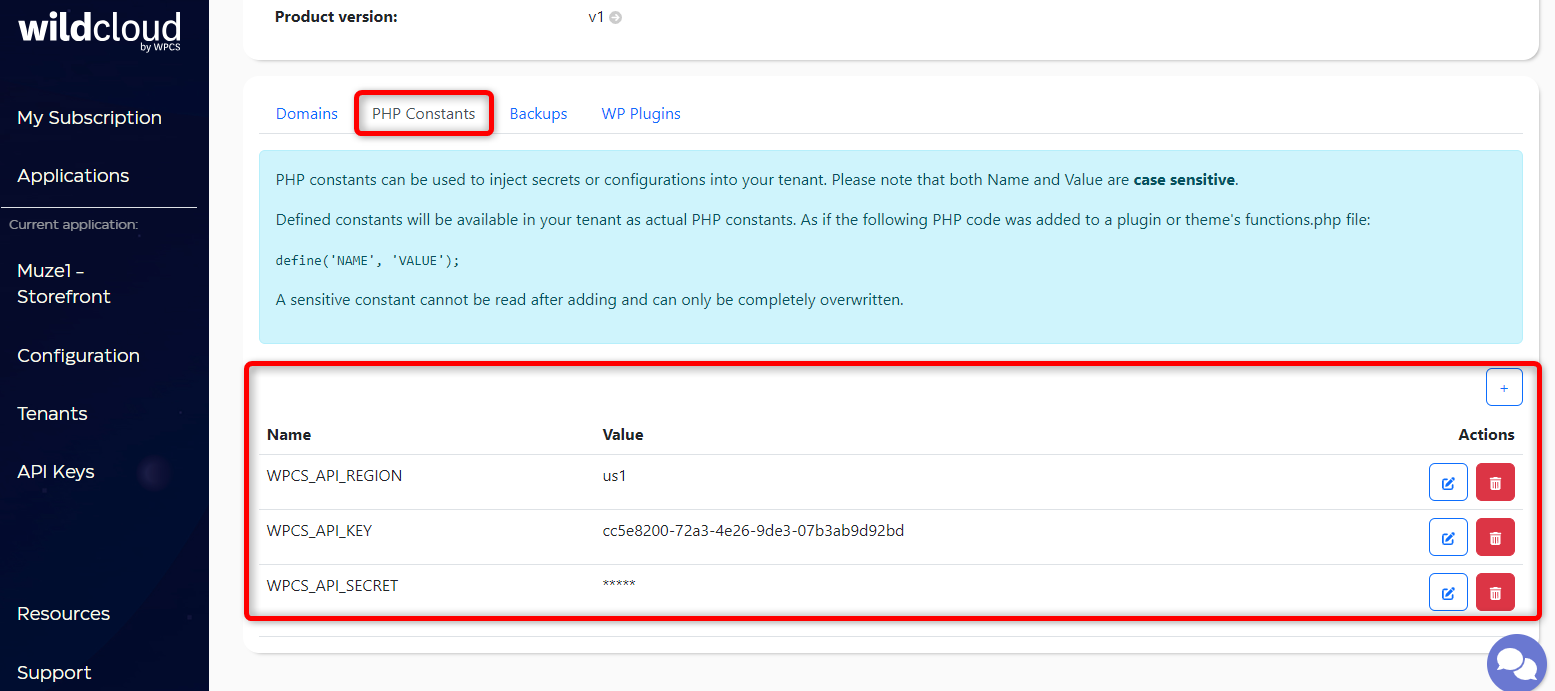
PHP Constants
To inject secrets or configurations into your tenant. Defined constants will be available in your tenant as actual PHP constants.
For more information, refer to the Create, Update, & Delete PHP Constants documentation.
Backups
Every application on the wildcloud Platform has a Backup for 30 days by default.
For more information, refer to the Create, Restore, & Delete Backups documentation.
WP Plugins
Displays the list of plugins which you can activate or deactivate for the particular tenant whenever you want.
For more information, refer to the Activate & Deactivate WP Plugins documentation.
In a similar way, you can also view details of the second (connected) application by navigating to:
- Go to application
- Go to version
- Go to tenant
