.png?height=120&name=wildcloud%20by%20WPCS%20logos%20(1).png)
The wildcloud application library contains preconfigured example applications that you can use as a scaffold for your unique product.
You can create an application consisting of a version, snapshot, and tenant based on a template from the application library. These objects provide a pre-installed and pre-configured WordPress installation to get started quickly.
In this documentation, we will explore the steps to create an application from the application library.
Let’s get started🚀
Step 1: Log in to your wildcloud account and you will be navigated to the Applications page by default.
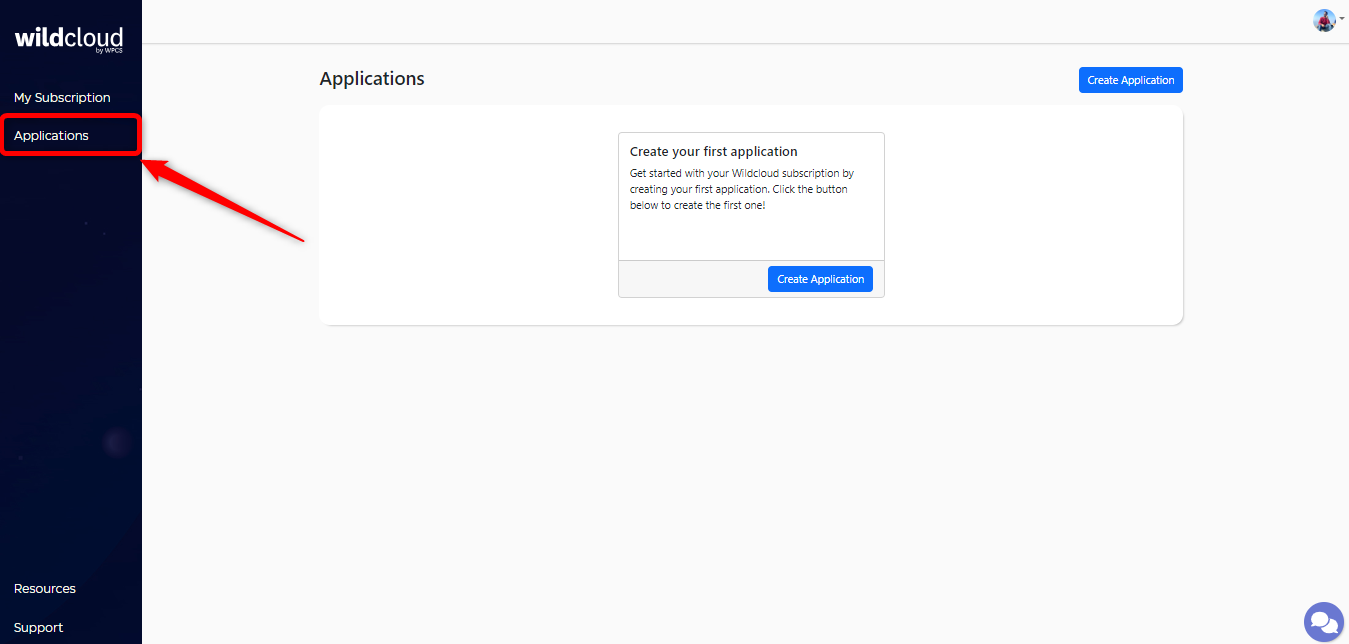
Step 2: Click on the Create Application to build your first application.

This will navigate you to the Create new application page providing you with a few options to start creating your application.
Step 3: Click on one of the preconfigured starting points to start working on your application.

Step 4: Select the template that you want to choose and click on the Next button.

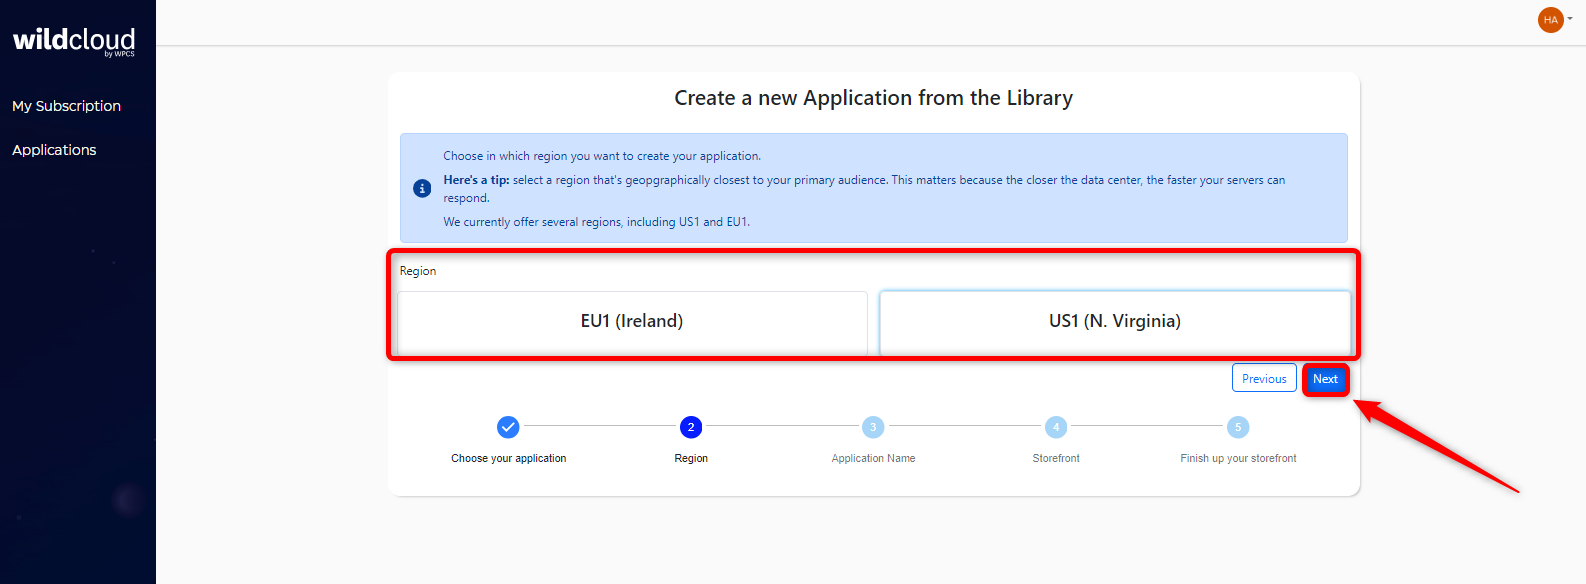
Step 5: Select the Region in which you want to create your application and click on the Next button.
Step 6: Enter the name you wish to give to your application and click on the Next button.

This will navigate you to the new page where you can set up and connect your storefront.
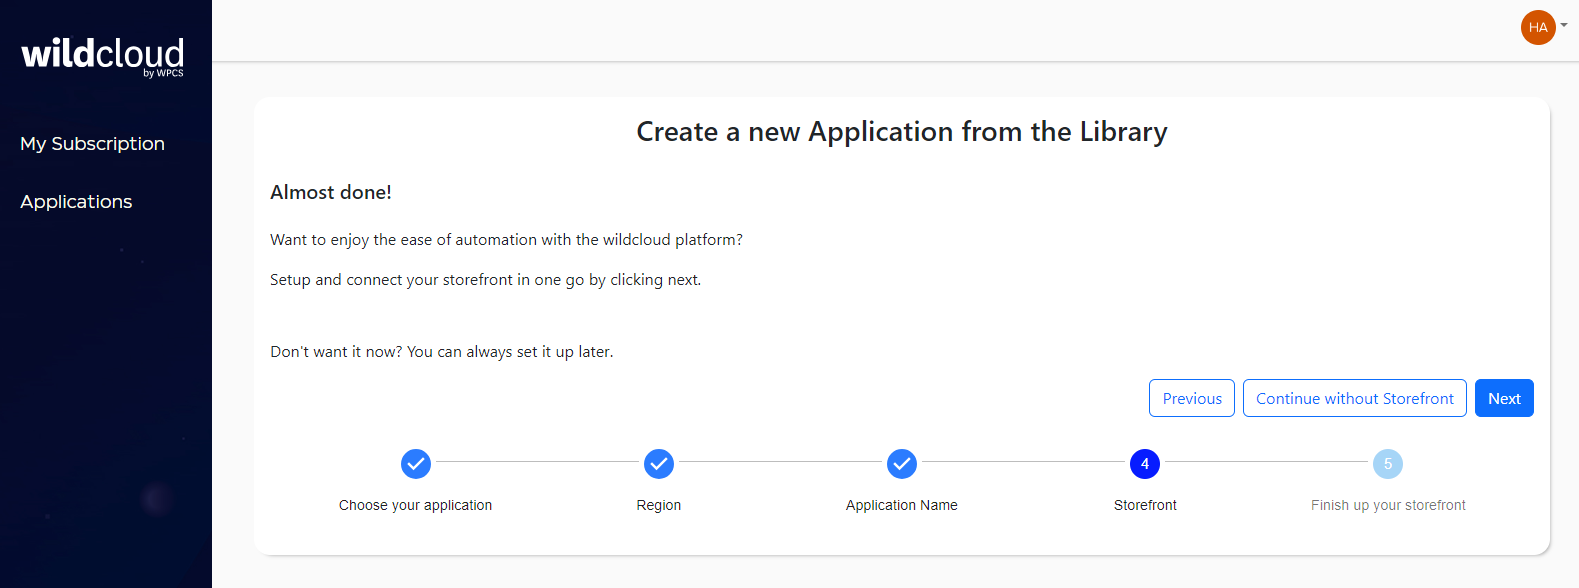
Step 7: Click on the Next button to connect with the storefront.
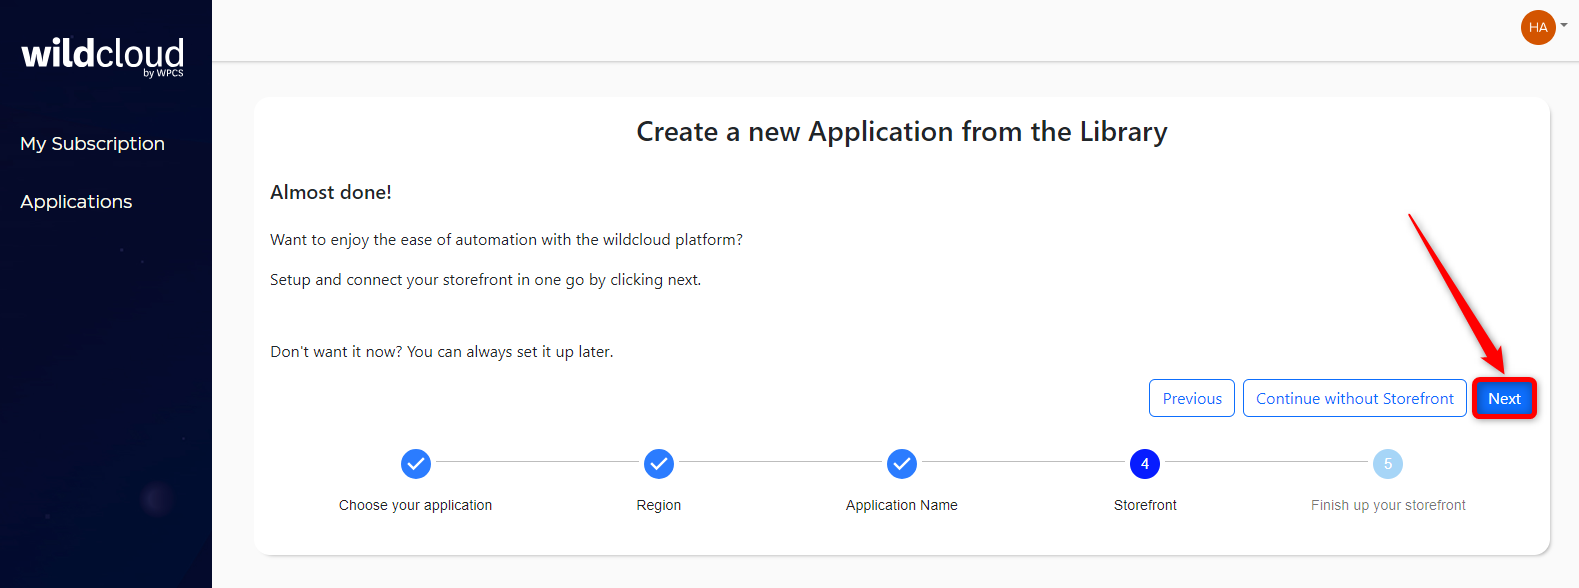
Note: If you do not want to connect the storefront, then click on Continue without Storefront button.
Step 8: Enter the name of your storefront and click on the Create and connect Storefront button.

This will create your application and navigate you to the Resource status page where you can view your newly created “application” and “connected storefront” along with the current version and tenant.
Note: It may take a few minutes to show the application resource status.

Step 9: Click on Go to Application to view the connected storefront details.

This will navigate you to the Storefront details page where you can explore general information about the storefront, version details, and tenant details.
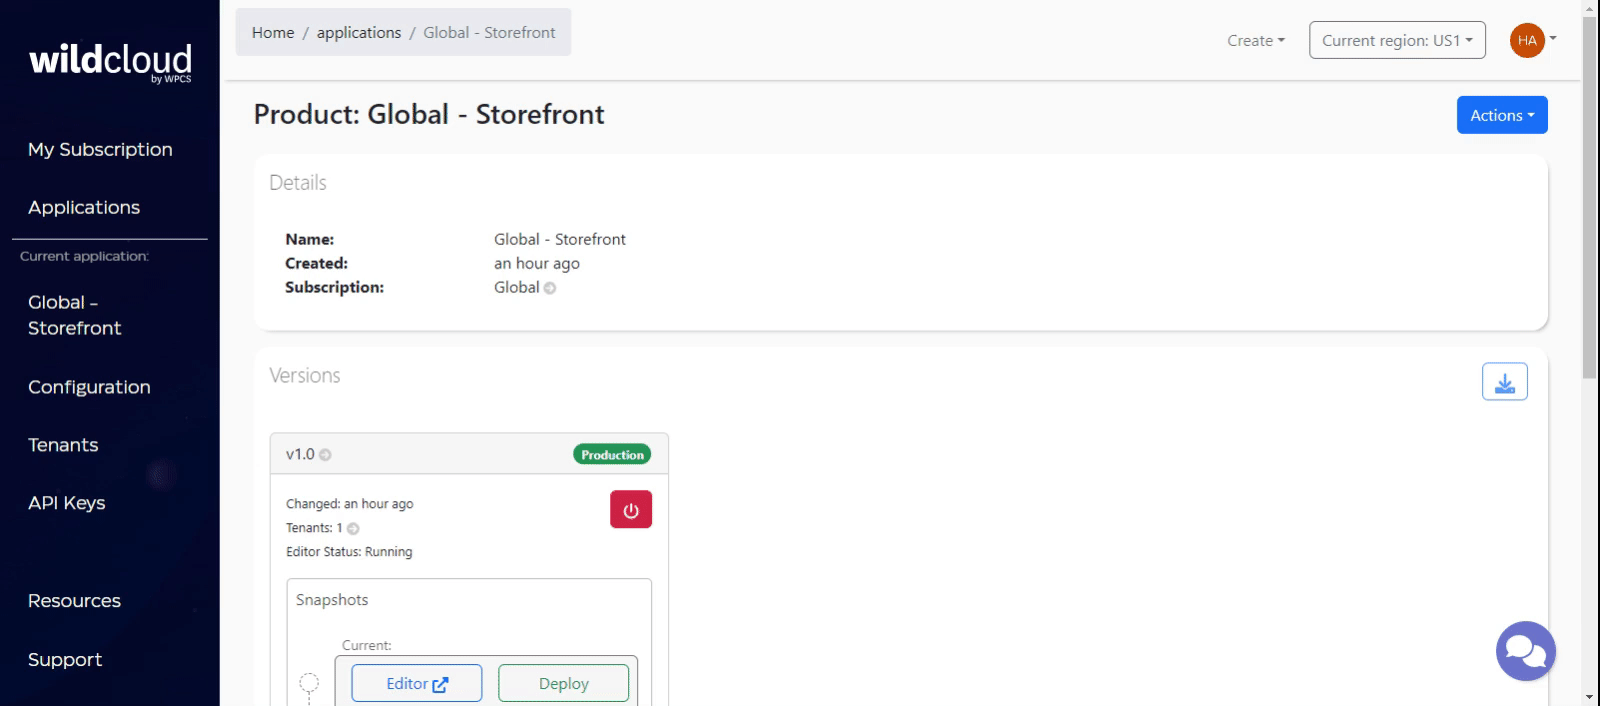
Storefront Details
General Information
|
Attribute |
Description |
|
Name |
Name of the Storefront |
|
Created |
Timestamp when the storefront was created |
|
Subscription |
Subscription under which the storefront is created |

Versions
Navigate to this section to perform the following actions:

You can also view all the snapshots (version, tenant, custom) created under the respective version of the newly created storefront.
Tenants
Navigate to this section to perform the following actions:

You can also view the tenants created and explore the following information.
|
Attribute |
Description |
|
Name |
Name of the created tenant |
|
URL |
URL link of the tenant |
|
Running on version |
Displays the version on which the tenant is currently running |
|
Last updated |
Timestamp when the tenant was updated last time |
|
Created |
Timestamp when the tenant was created |
|
Status |
Displays the status of the tenant |

Step 10: Click on Go to version to view the first version of your connected storefront.
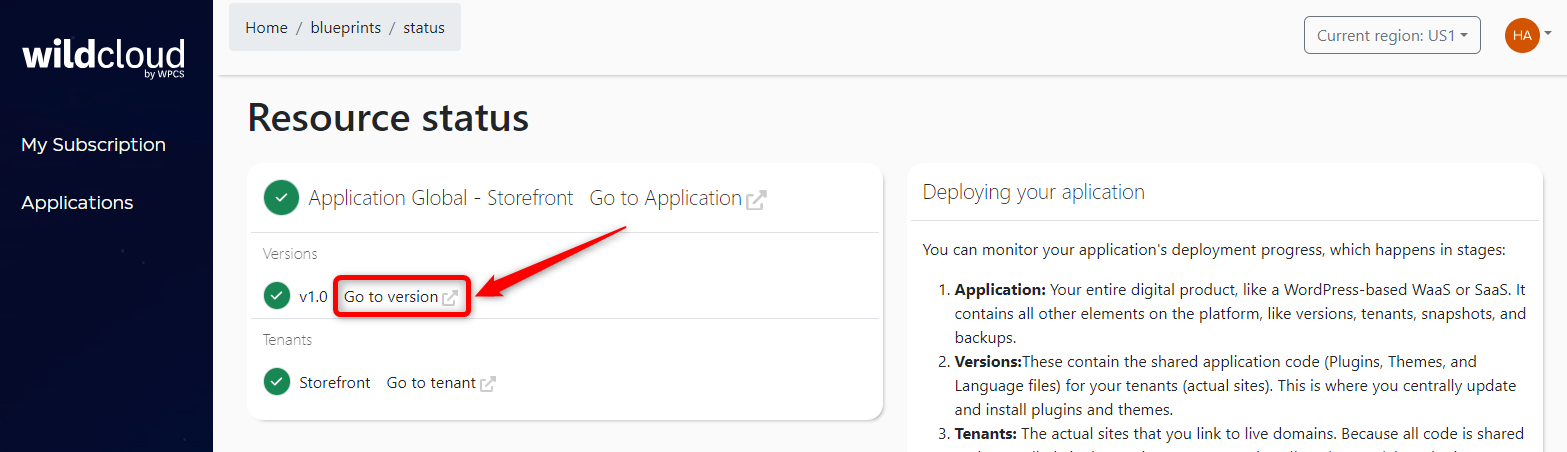
This will navigate you to the version details page of the storefront where you can explore general information about the version, tenants, and snapshots.

Version Details
General Information
|
Attribute |
Description |
|
Name |
Displays the name of the version |
|
Updated |
Timestamp when the version was updated last time |
|
Created |
Timestamp when the version was created |
|
WordPress version |
Displays the latest WordPress version using which the application is created |
|
PHP version |
Displays the latest PHP version using which the application is created |
|
Status |
Displays the status of the application |

Tenants
You can view the list of the created tenants and view the following information related to them.
|
Attribute |
Description |
|
Name |
Name of the created tenant |
|
URL |
URL link of the tenant |
|
Last updated |
Timestamp when the tenant was updated last time |
|
Created |
Timestamp when the tenant was created |
|
Status |
Displays the status of the tenant |

Snapshots
Displays all the snapshots (version, tenant, custom) created under the respective version of the storefront.

Step 11: Click on Go to tenant to view the tenants of the storefront.

This will navigate you to the tenant details page of the storefront where you can explore general information about the tenants, domains, PHP constants, backups, and WP plugins.

Tenant Details
General Information
|
Attribute |
Description |
|
Name |
Displays the name of the tenant |
|
Updated |
Timestamp when the tenant was updated last time |
|
Created |
Timestamp when the tenant was created |
|
External ID |
Displays the external ID (identifier) of the tenant |
|
Product version |
Displays the version of the tenant |

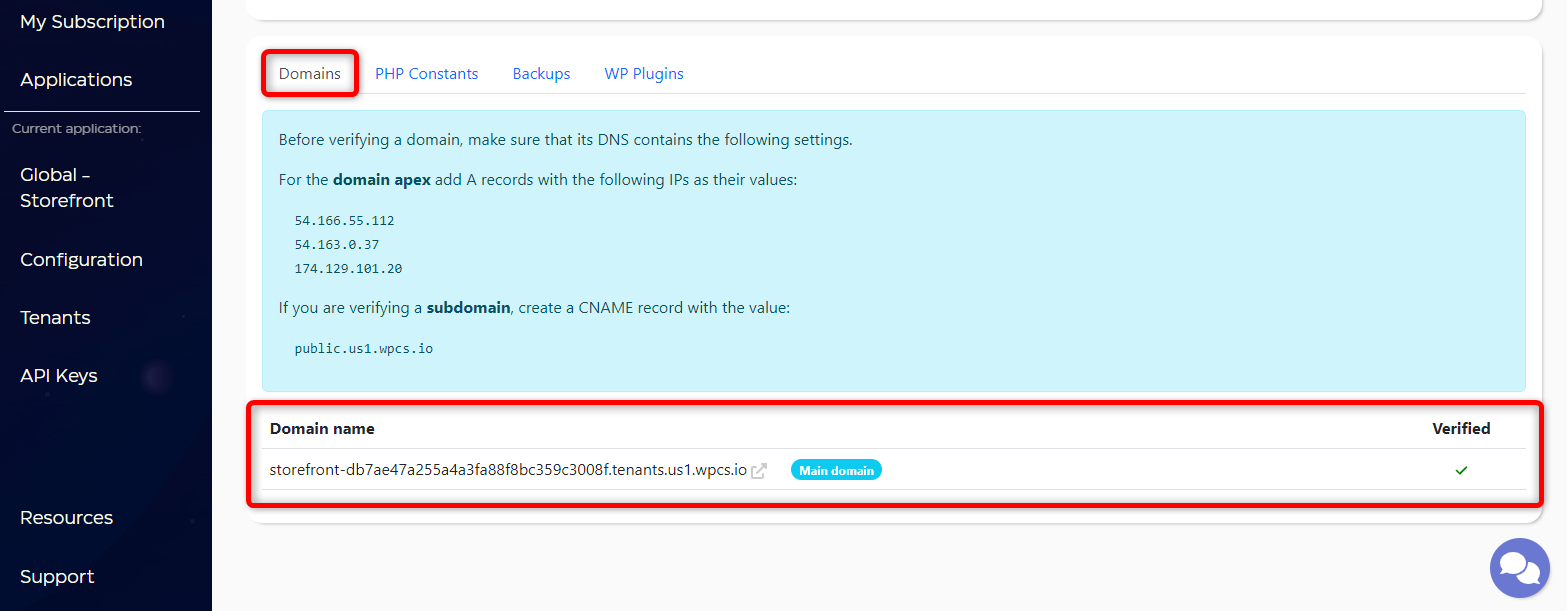
Domains
Displays the domain name of the storefront.
For more information, refer to the Add, Verify & Delete Domain documentation.
PHP Constants
To inject secrets or configurations into your tenant. Defined constants will be available in your tenant as actual PHP constants.
For more information, refer to the Create, Update, & Delete PHP Constants documentation.

Backups
Every tenant in an application on the wildcloud Platform has a Backup for 30 days by default. However, users may also choose an option not to backup the tenants.
For more information, refer to the Create, Restore, & Delete Backups documentation.

WP Plugins
Displays the list of plugins which you can activate or deactivate for the particular tenant whenever you want.
For more information, refer to the Activate & Deactivate WP Plugins documentation.

In a similar way, you can also view details of the second application by navigating to:
- Go to application
- Go to version
If no tenant is deployed in the second application, you can create it in two ways:
